Stopping a process from crapping out without PIDcrap

So, this one comes up a lot too. So you wanna run a process, and you don’t want it to crap out, you don’t want PIDCrap or any other lunatic solution that simply doesn’t work 100%. Well, welcome to until.

I’ve been executing a ruby script that does some stuff with fog.

ruby my-fog-cloud-files-container-deleter-thingy.rb

but, it keeps crapping out with lots of errors

I figured crapout no more and nabbed this handy snippet, credit to good ole stackoverflow

until ruby my-fog-cloud-files-container-deleter-thingy.rb; do
    echo "Server 'myserver' crashed with exit code $?.  Respawning.." >&2
    sleep 1
done

Now when it craps out, it continues where it left off.. nice, simple, elegant.

I don’t know what kind of error handling swiftly and pyrax has available in built, but this is a nice way to do it. Theoretically this oneliner might be of use for turbolift as well as any other batch like job which might end prematurely before the code deploy finishes. I wish cloud init had something like this

Removing and purging all Rackspace Cloud Files from all containers

So, this one comes up a lot at work, and thanks to knowitnot.com I came accross this example using ruby and fog, its simple, dont runnaway!

Regex lets you define the exact things you want to delete, but be careful. I’m using .* , I’ve removed it and replaced it with some_regex, to make sure people don’t accidentally nuke their cloud files 😀

Install first

yum install rubygem-fog.noarch
#!/usr/bin/env ruby
# Author: Jason Barnett 

require 'fog'

def delete_file(container, file_num, max_tries)
  max_retries ||= max_tries
  try = 0
  puts "(#{file_num} of #{container.files.count}) Removing #{container.files[file_num].key}"
  begin
    container.files[file_num].destroy
  rescue Excon::Errors::NotFound, Excon::Errors::Timeout, Fog::Storage::Rackspace::NotFound => e
    if try == max_retries
      $stderr.puts e.message
    else
      try += 1
      puts "Retry \##{try}"
      retry
    end
  end
end

def equal_div(first, last, num_of_groups)
  total      = last - first
  group_size = total / num_of_groups + 1

  top    = first
  bottom = top + group_size
  blocks = 1.upto(num_of_groups).inject([]) do |result, x|
    bottom = last if bottom > last
    result << [ top, bottom ]

    top    += group_size + 1
    bottom =  top + group_size

    result
  end

  blocks
end

service = Fog::Storage.new({
    :provider             => 'Rackspace',               # Rackspace Fog provider
    :rackspace_username   => 'your_rackspace_username', # Your Rackspace Username
    :rackspace_api_key    => 'your_api_key',            # Your Rackspace API key
    :rackspace_region     => :ord,                      # Defaults to :dfw
    :connection_options   => {},                        # Optional
    :rackspace_servicenet => false                      # Optional, only use if you're the Rackspace Region Data Center
})

containers = service.directories.select do |s|
  s.key =~ /^some_regex/  # Only delete containers that match the regexp
end

TOT_THREADS = 4
threads     = []

containers.each do |container|
  puts
  puts "-----------------------------------------"
  puts "-- Removing _ALL_ objects from #{container.key}"
  puts "-----------------------------------------"
  puts

  #puts "container.files.count: #{container.files.count}"

  ## separates the number of files into equal groups to distribute to each thread
  mygroups = equal_div(0, container.files.count - 1, TOT_THREADS)

  0.upto(TOT_THREADS - 1) do |thread|
    threads << Thread.new([ container, mygroups[thread] ]) { |tObject|
      tObject[1][0].upto(tObject[1][1]) do |x|
        delete_file(tObject[0], x, 5)
      end
    }

  end
  threads.each { |aThread|  aThread.join }
  puts "Deleting #{container.key}"
  container.destroy
end

The script works, supporting multiple threads:

(8178 of 10000) Removing conv/2015/04/15/08/bdce78e4cab875e9e17eeeae051b1128.log.gz
(3183 of 10000) Removing conv/2015/03/17/18/0ea71bf7a834fc02b01c7f65c4eb23b0.log.gz
(5685 of 10000) Removing conv/2015/04/01/08/e4d6a7a2ee83d0be116cca6b1a92ad2a.log.gz
(682 of 10000) Removing conv/2015/02/26/07/163f33cf4e33c64139ab3bd7092a9478.log.gz
(8179 of 10000) Removing conv/2015/04/15/09/09ef6c4ecaa9341e76648b6e175db888.log.gz
(5686 of 10000) Removing conv/2015/04/01/09/23fa1dce145c8343efd8e0227fd41e35.log.gz
(3184 of 10000) Removing conv/2015/03/17/18/66cb5ac707c40777a1a78b1486e1c4f3.log.gz
(683 of 10000) Removing conv/2015/02/26/07/35f28368ed45b2fb7c7076c3b78eb008.log.gz
(5687 of 10000) Removing conv/2015/04/01/09/42882b705c2d7cfe5c726ddec3e457fc.log.gz
(3185 of 10000) Removing conv/2015/03/17/18/73dbb421db0093279138b6f69f246c06.log.gz
(8180 of 10000) Removing conv/2015/04/15/09/1a01e6b1779b76b5221b1c8c08398b00.log.gz
(684 of 10000) Removing conv/2015/02/26/07/44a59e91f6632383f18ff253e4404dba.log.gz
(3186 of 10000) Removing conv/2015/03/17/18/8f8ba5791ab0c1979b168517b229ef74.log.gz
(5688 of 10000) Removing conv/2015/04/01/09/8ff43c8a5de8a41ee9890686150c8c19.log.gz
(8181 of 10000) Removing conv/2015/04/15/09/28035bc7882fe36bb33da670e6c71ac0.log.gz
(685 of 10000) Removing conv/2015/02/26/07/7947d1b3f712d175281d33a6073531d9.log.gz
(8182 of 10000) Removing conv/2015/04/15/09/34a597377f63709a75c9fd6e8a68e073.log.gz
(3187 of 10000) Removing conv/2015/03/17/18/a92a58f166cc9bd1ff54a5f996bb776b.log.gz
(5689 of 10000) Removing conv/2015/04/01/09/9a728570208bcac32fd11f1581a57fbb.log.gz

MySQL running out of memory being killed by OOM Killer

So, every now and then we get customers asking if they can increase their memory because MySQL keeps on being killled by the kernel, mainly because on say a 2GB physical RAM server, MySQL eats it all up and even tries to use more than is there. So the kernel scheduler is like ‘no.. stop that’. This kind of thing could be avoided by configuring MySQL with proper limits as to not flood the physical hardware.

This is often and commonly overlooked in MySQL databases, and no tuning is done, but it’s important to base the MySQL configuration (/etc/my.conf) on the physical hardware of the server. So IF you increase the RAM on the server, to get the optimum speed you’d want to increase some of the RAM usage. A friend of mine said of a great trick used by many organisations of pointing the mysql filesystem to memory, this is a great performance increase, as it completely avoids the filesystem, the only downside is if the box turns off, the database is gone 😀

innodb_buffer_pool_size = 384M
key_buffer = 256M
query_cache_size = 1M
query_cache_limit = 128M
thread_cache_size = 8
max_connections = 400
innodb_lock_wait_timeout = 100

I found this config for a 2GB server on stack overflow, and it looks just about right. Adjusting the connections to suit should ensure that the box doesn’t get too overloaded, but also the memory is important too. One thing to bare in mind, by restricting RAM queries might not run as fast, but the database won’t suddenly go offline and process be killed this way. That’s what you want, really isn’t it;.

Using Meta-data to track Rackspace Cloud Servers

Hey, so from time to time we have customers who ask us about how they can tag their servers, this might be for automation or for means of organising their servers. Whilst it’s not possible to tag servers thru the API in such a way that it shows the ‘tag’ in the UI, that you can add in the mycloud control panel. You can instead use the cloud server meta-data set command, it’s easy enough. Here is how I achieved it.

set-meta-data.sh

#!/bin/bash

USERNAME='mycloudusername'
APIKEY='mycloudapikey'
# Tenant ID (account number is the number shown in the URL address when logged into Rackspace control panel)
ACCOUNT_NUMBER=1001010
API_ENDPOINT="https://lon.servers.api.rackspacecloud.com/v2/$ACCOUNT_NUMBER"
SERVER_ID='e9036384-c9be-4c8c-8551-c2f269c424bc'

# This just grabs from a large JSON output the AUTH TOKEN for the API. We auth with the apikey, and we get the auth token and set it in this variable 'TOKEN'
TOKEN=`curl https://identity.api.rackspacecloud.com/v2.0/tokens -X POST -d '{ "auth":{"RAX-KSKEY:apiKeyCredentials": { "username":"'$USERNAME'", "apiKey": "'$APIKEY'" }} }' -H "Content-type: application/json" |  python -mjson.tool | grep -A5 token | grep id | cut -d '"' -f4`


# Then we re-use the $TOKEN we retrieved for the call to the API, supply the $ACCOUNT_NUMBER and importantly, the $API_ENDPOINT.
# Also we sent a file, metadata.json that contains the meta-data we want to add to the server.
curl -s -v  \
-H "X-Auth-Token: $TOKEN"  \
-H "X-Project-Id: $ACCOUNT_NUMBER" \
-H "Accept: application/json"  \
-X PUT -d @metadata.json -H "content-type: application/json" "$API_ENDPOINT/servers/$SERVER_ID/metadata" | python -mjson.tool

metadata.json

{
    "metadata": {
        "Label" : "MyServer",
        "Version" : "v1.0.1-2"
    }
}
chmod +x set-meta-data.sh
./set-meta-data.sh

OK , so now you’ve set the data.

What about retrieving it you ask? That’s not too difficult. Just remove the PUT and replace it with a GET, and take away the -d @metadata.json bit, and we’re off, like so:

get-meta-data.sh


#!/bin/bash

USERNAME='mycloudusername'
APIKEY='mycloudapikey'
ACCOUNT_NUMBER=1001010
API_ENDPOINT="https://lon.servers.api.rackspacecloud.com/v2/$ACCOUNT_NUMBER"
SERVER_ID='c2036384-c9be-4c8c-8551-c2f269c4249r'


TOKEN=`curl https://identity.api.rackspacecloud.com/v2.0/tokens -X POST -d '{ "auth":{"RAX-KSKEY:apiKeyCredentials": { "username":"'$USERNAME'", "apiKey": "'$APIKEY'" }} }' -H "Content-type: application/json" |  python -mjson.tool | grep -A5 token | grep id | cut -d '"' -f4`


curl -s -v  \
-H "X-Auth-Token: $TOKEN"  \
-H "X-Project-Id: $ACCOUNT_NUMBER" \
-H "Accept: application/json"  \
-X GET "$API_ENDPOINT/servers/$SERVER_ID/metadata" | python -mjson.tool

simples! and as the fonz would say ‘Hey, grades are not cool, learning is cool. ‘

chmod +x get-meta-data.sh
./get-meta-data.sh 

Testing CDN Consistency with bash date time curl while loop

This is a simple one. Soa customer was complaining that after 3 minutes the cache time of the file on his CDN was changing. I wanted to built a way to test the consistency of the requests. Here is how I did it.

file curl-format.txt

     timenamelookup:  %{time_namelookup}\n
       time_connect:  %{time_connect}\n
    time_appconnect:  %{time_appconnect}\n
   time_pretransfer:  %{time_pretransfer}\n
      time_redirect:  %{time_redirect}\n
 time_starttransfer:  %{time_starttransfer}\n
                    ----------\n
         time_total:  %{time_total}\n

Short, simple, and to the point;

while ((1!=0)); do date; curl -w "@curl-format.txt" -o /dev/null -s "https://www.somecdndomain.secure.raxcdn.com/img/upload/3someimage_t32337827238.jpg"; done;

Output looks like:

                    ----------
         time_total:  0.395
Tue Feb  9 09:03:28 UTC 2016
      time_namelookup:  0.151
       time_connect:  0.154
    time_appconnect:  0.332
   time_pretransfer:  0.333
      time_redirect:  0.000
 time_starttransfer:  0.338
                    ----------
         time_total:  0.351
Tue Feb  9 09:03:28 UTC 2016
      time_namelookup:  0.151
       time_connect:  0.154
    time_appconnect:  0.324
   time_pretransfer:  0.324
      time_redirect:  0.000
 time_starttransfer:  0.331
                    ----------
         time_total:  0.347
Tue Feb  9 09:03:29 UTC 2016
      time_namelookup:  0.151
       time_connect:  0.154
    time_appconnect:  0.385
   time_pretransfer:  0.385
      time_redirect:  0.000
 time_starttransfer:  0.391
                    ----------
         time_total:  0.404
Tue Feb  9 09:03:29 UTC 2016
      time_namelookup:  0.151
       time_connect:  0.155
    time_appconnect:  0.348
   time_pretransfer:  0.349
      time_redirect:  0.000
 time_starttransfer:  0.357
                    ----------
         time_total:  0.374
Tue Feb  9 09:03:30 UTC 2016
      time_namelookup:  0.151
       time_connect:  0.155
    time_appconnect:  0.408
   time_pretransfer:  0.409
      time_redirect:  0.000
 time_starttransfer:  0.417
                    ----------
         time_total:  0.433
Tue Feb  9 09:03:30 UTC 2016

pretty handy andy.

With headers

# while ((1!=0)); do date; curl -IL -w "@curl-format.txt" -s "https://www.scdn3.secure.raxcdn.com/img/upload/3_sdsdsds6a9e80df0baa19863ffb8.jpg"; sleep 180; done;

Installing Kali Linux on the Cloud

So, I want to install Kali Linux on the cloud, which… for me is good, but I highly recommend against doing this on any other cloud than your own private cloud.

katoolin

It’s actually pretty simple to get started with Kali, since it’s based on Debian and Ubuntu based distros (mainly debian from what I understand), it’s possible to install the repo’s on both Ubuntu and Debian. There’s even a really nice tool I found on techmint.com explaining the process. Here I am using wheezy 7. I’m pretty sure I could have used Debian, Jessie 8 though.

Step 1. Update repo and install git

# Update your repository
apt-get update
# Install git
apt-get install git

Step 2. Install katoolin from git

git clone https://github.com/LionSec/katoolin.git  && cp katoolin/katoolin.py /usr/bin/katoolin
# Make sure katoolin can be executed
chmod +x  /usr/bin/katoolin

# Start script to install kali
katoolin

What katoolin looks like

 $$\   $$\             $$\                         $$\ $$\           
 $$ | $$  |            $$ |                        $$ |\__|          
 $$ |$$  /  $$$$$$\  $$$$$$\    $$$$$$\   $$$$$$\  $$ |$$\ $$$$$$$\  
 $$$$$  /   \____$$\ \_$$  _|  $$  __$$\ $$  __$$\ $$ |$$ |$$  __$$\ 
 $$  $$<    $$$$$$$ |  Kali linux tools installer |$$ |$$ |$$ |  $$ |
 $$ |\$$\  $$  __$$ |  $$ |$$\ $$ |  $$ |$$ |  $$ |$$ |$$ |$$ |  $$ |
 $$ | \$$\ \$$$$$$$ |  \$$$$  |\$$$$$$  |\$$$$$$  |$$ |$$ |$$ |  $$ |
 \__|  \__| \_______|   \____/  \______/  \______/ \__|\__|\__|  \__| V1.0 


 + -- -- +=[ Author: LionSec | Homepage: www.lionsec.net
 + -- -- +=[ 330 Tools 


1) Add Kali repositories & Update 
2) View Categories
3) Install classicmenu indicator
4) Install Kali menu
5) Help

Press 1 to add kali repositories and update.
Then press 1 again. It just set the repositories.
Now press 2. It will update the repositories.

Just one more step!

Then type 'gohome' to return to the first menu.
Then press '2' to see selection of packages to install
Then press '0' to install all of them.

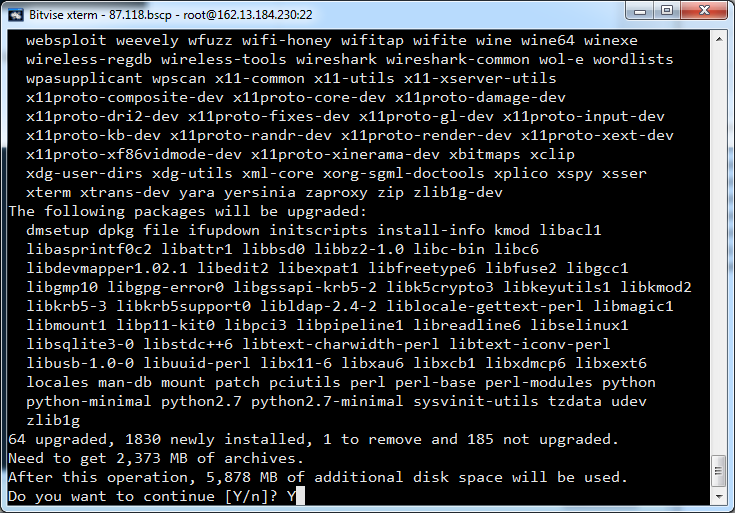
Installing goodies..

katoolin-upgrade

Rackspace Customer takes the time to improve my script :D

Wow. this was an awesome customer. Who was obviously capable in using the API but was struggling. So I thrown them my portable python -mjson parsing script for identity token and glance image export to cloud files. So,the customer wrote back, commenting that I’d made a mistake, specifically I had added ‘export’ instead of ‘exports’

#!/bin/bash

# Task ID - supply with command
TASK=$1
# Username used to login to control panel
USERNAME='myusername'
# Find the APIKey in the 'account settings' part of the menu of the control panel
APIKEY='myapikeyhere'

# This section simply retrieves the TOKEN
TOKEN=`curl https://identity.api.rackspacecloud.com/v2.0/tokens -X POST -d '{ "auth":{"RAX-KSKEY:apiKeyCredentials": { "username":"'$USERNAME'", "apiKey": "'$APIKEY'" }} }' -H "Content-type: application/json" |  python -mjson.tool | grep -A5 token | grep id | cut -d '"' -f4`

# Requests progress of specified task
curl -X GET -H "X-Auth-Token: $TOKEN" "https://lon.images.api.rackspacecloud.com/v2/10010101/tasks/$TASK"

I just realised that the customer didn’t adapt the script to be able to pass in the image ID, on the initial export to cloud files.

Theoretically you could not only do the above but.. something like:

I just realised your script you sent checks the TASK. I just amended my initial script a bit further with your suggestion to accept myclouduser mycloudapikey and mycloudimageid

#!/bin/bash

# Username used to login to control panel
USERNAME=$1
# Find the APIKey in the 'account settings' part of the menu of the control panel
APIKEY=$2

# Find the image ID you'd like to make available on cloud files
IMAGEID=$3

# This section simply retrieves the TOKEN
TOKEN=`curl https://identity.api.rackspacecloud.com/v2.0/tokens -X POST -d '{ "auth":{"RAX-KSKEY:apiKeyCredentials": { "username":"'$USERNAME'", "apiKey": "'$APIKEY'" }} }' -H "Content-type: application/json" |  python -mjson.tool | grep -A5 token | grep id | cut -d '"' -f4`


# This section requests the Glance API to copy the cloud server image uuid to a cloud files container called export
curl https://lon.images.api.rackspacecloud.com/v2/10031542/tasks -X POST -H "X-Auth-Token: $TOKEN" -H "Content-Type: application/json" -d '{"type": "export", "input": {"image_uuid": "'"$IMAGEID"'", "receiving_swift_container": "exports"}}'

# I thought that could theoretically process the output of the above and extract $TASK_ID to check the TASK too.

Note my script isn’t perfect but the customer did well!

This way you could simply provide to the script the cloud username, password and imageid. Then when the glance export starts, the task could be extracted in the same way as the TOKEN is from identity auth.

That way you could simply run something like

./myexportvhd.sh mycloudusername mycloudapikey mycloudimageid 

Not only would it start the image export to a set export folder.
But it'd provide you an update as to the task status.

You could go further, you could then watch the tasks status with a batch script while loop, until all show a complete or failed output and then record which ones succeeded and which ones failed. You could then create a batch script off that which downloaded and rsynched to somewhere the ones that succeeded.

Or..something like that.

I love it when one of our customers makes me think really hard. Gotta love that!

Adding mail ports to Linux firewall with iptables

So a customer had flushed his iptables rules, and sadly wasn’t able to use SMTP and POP. So I put together this basic tutorial explaining how to do it!


The following ports are used for mail commonly:

SMTP 	587
POP 	110
POPS 	995
IMAP 	143
IMAP3 	993

To add these ports to the firewall rules;

# Allows SMTP access

iptables -A INPUT -p tcp --dport 25 -j ACCEPT 

# Allows pop and pops connections 

iptables -A INPUT -p tcp --dport 110 -j ACCEPT
iptables -A INPUT -p tcp --dport 995 -j ACCEPT

# Allows imap and imaps connections 

iptables -A INPUT -p tcp --dport 143 -j ACCEPT
iptables -A INPUT -p tcp --dport 993 -j ACCEPT

Downloading exported Cloud Server Image from Cloud Files using BASH/curl/API

So, after succesfully exporting the image in the previous article, I wanted to download the VHD so I could use it on virtualbox at home.

#!/bin/bash

# Username used to login to control panel
USERNAME='adambull'
# Find the APIKey in the 'account settings' part of the menu of the control panel
APIKEY='mycloudapikey'
# Find the image ID you'd like to make available on cloud files

# Simply replace mytenantidgoeshere10011111etc with just the account number, the number given in the url in mycloud control panel! replace everything after _ so it looks like _101110
TENANTID='MossoCloudFS_mytenantidgoeshereie1001111etc'

# This section simply retrieves the TOKEN
TOKEN=`curl https://identity.api.rackspacecloud.com/v2.0/tokens -X POST -d '{ "auth":{"RAX-KSKEY:apiKeyCredentials": { "username":"'$USERNAME'", "apiKey": "'$APIKEY'" }} }' -H "Content-type: application/json" |  python -mjson.tool | grep -A5 token | grep id | cut -d '"' -f4`

# Download the cloud files image

VHD_FILENAME=5fb64bf2-afae-4277-b8fa-0b69bc98185a.vhd
curl -o -i -X GET "https://storage101.lon3.clouddrive.com/v1/$TENANTID/exports/$VHD_FILENAME" \
-H "X-Auth-Token: $TOKEN"

Really really easy

Output looks like;

 ./download-image-id.sh
  % Total    % Received % Xferd  Average Speed   Time    Time     Time  Current
                                 Dload  Upload   Total   Spent    Left  Speed
100  5143  100  5028  100   115   4470    102  0:00:01  0:00:01 --:--:--  4473
  % Total    % Received % Xferd  Average Speed   Time    Time     Time  Current
                                 Dload  Upload   Total   Spent    Left  Speed
  1 3757M    1 38.1M    0     0  7231k      0  0:08:52  0:00:05  0:08:47 7875k

Exporting Rackspace Cloud Server Image to Cloud Files (so you can download it)

So today, a customer wanted to know if there was a way to export a Rackspace Cloud Server image out of Rackspace to download it. Yes, this is possible and can be done using the Images API and Cloud Files. Here is a summary of the basic process below;

Step 1: Make container called ‘export’ in cloud files; You can do this thru the mycloud control panel by navigating to your cloud files and simply clicking create container, call it ‘export’.

Screen Shot 2016-01-22 at 2.46.56 PM

Step 2: Create bash script to query API with correct user, apikey and imageid;

vim mybashscript.sh
#!/bin/bash

# Username used to login to control panel
USERNAME='mycloudusernamehere'
# Find the APIKey in the 'account settings' part of the menu of the control panel
APIKEY='mycloudapikeyhere'
# Find the image ID you'd like to make available on cloud files
# set the image id below of the image you want to copy to cloud files, see in control panel
IMAGEID="5fb24bf2-afae-4277-b8fa-0b69bc98185a"

# This section simply retrieves the TOKEN
TOKEN=`curl https://identity.api.rackspacecloud.com/v2.0/tokens -X POST -d '{ "auth":{"RAX-KSKEY:apiKeyCredentials": { "username":"'$USERNAME'", "apiKey": "'$APIKEY'" }} }' -H "Content-type: application/json" |  python -mjson.tool | grep -A5 token | grep id | cut -d '"' -f4`

# This section requests the Glance API to copy the cloud server image uuid to a cloud files container called export
curl https://lon.images.api.rackspacecloud.com/v2/10045567/tasks -X POST -H "X-Auth-Token: $TOKEN" -H "Content-Type: application/json" -d '{"type": "export", "input": {"image_uuid": "'"$IMAGEID"'", "receiving_swift_container": "exports"}}'

It’s so simple I had to check myself that it was really this simple.

It is. yay! Next guide shows you how to download the image you made.