Configure Nested KVM for Intel & AMD based Machines

So, we are configuring some openstack and kvm stuff at work for some projects. We’re ‘cloudy’ guys. What can I say? 😀 One Issue I had when installing xenserver, underneath KVM.

(why would we do this?) In our testing environment we’re using a single OnMetal v2 server, and, instead of running xenserver directly on the server, and requiring additional servers, we are using a single 128GB RAM hypervisor for the test environment. One issue though is that Windows is only supported with xenserver when directly run on the ‘host’. Because Xen is running virtualized under KVM we have a problem.

Enter, tested virtualization support. Hardware virtualization assist support will now work for xenserver thru KVM, which means I can boot windows servers. YAY! uh.. 😉 kinda.

Check if Nested hardware virtualization assist is enabled

$cat /sys/module/kvm_intel/parameters/nested
N

It wasn’t 🙁 Lets enable it

Enable nested hardware virtualization assist

sudo rmmod kvm-intel
sudo sh -c "echo 'options kvm-intel nested=y' >> /etc/modprobe.d/dist.conf"
sudo modprobe kvm-intel

Ensure nested hardware virtualization is enabled

cat /sys/module/kvm_intel/parameters/nested
Y

modinfo kvm_intel | grep nested
parm:           nested:bool

It worked!

This can also be done for AMD systems simply substituting kvm_amd.

http://docs.openstack.org/developer/devstack/guides/devstack-with-nested-kvm.html

HOWTO: Rackspace Automation, Using BASH with API (to validate conditions to perform conditional tasks)

In the previous article, I showed how to wipe clean the windows password from a broken Virtual Machine that you were locked out of by rescuing with a Linux image. In this article I explain steps of how you would automate this with a bash script, that looked at the STATE of the server, and accepts commandline arguments.

It’s quite a simple script;

#!/bin/bash
# Adam Bull
# April 28 2016
# This script automates the resetting of windows passwords
# Arguments $1 == instanceuuid
# Arguments $2 == username
# Arguments $3 == apikey

PASSWORD=mypassword

# Provide an instance uuid to rescue and reset windows password

USERNAME=$1
APIKEY=$2
DDI=$3
INSTANCE=$4


nova  --os-username $USERNAME --os-auth-system=rackspace  --os-tenant-name $DDI --os-auth-url https://lon.identity.api.rackspacecloud.com/v2.0/ --os-password $APIKEY --insecure rescue --password mypassword --image 7fade26a-0cca-415f-a988-49c021768fca $INSTANCE

The above script takes the arguments I give the executable script on the commandline, in this case the first argument passed is $1, the Rackspace mycloud username. The second argument the apikey. etc. This basically puts the server into rescue. But.. what if we wanted to run some automation AFTER it rescued? We don’t want to try and let the automation ssh to the box and run the automation early, so we could use a supernova show to find whether the VM state has changed to ‘rescue’. Whilst its initiating the state will be rescuing. So we have the option of using when !rescueing logic, or, when == equal to rescue. Lets use when equal to rescue in our validation loop.

This loop will continue until the task state changes to the desired value. Here is how we achieve it

#!/bin/bash
# Initialize Variable
STATE=0
# Validate $STATE variable, looping UNTIL $STATE == rescued
until [[ $STATE == rescued ]]; do
echo "start rescue check"
# 'show' the servers data, and grep for rescued and extract only the correct value if it is found
STATE=`nova --os-username $USERNAME --os-auth-system=rackspace  --os-tenant-name $DDI --os-auth-url https://lon.identity.api.rackspacecloud.com/v2.0/ --os-password $APIKEY --insecure show $INSTANCE | grep rescued | awk '{print $4}'`

# For debugging
echo "STATE =" $STATE
echo "sleeping.."

# For API Limit control
sleep 5
# Exit the loop once until condition satisfied
done

# Post Rescue
echo "If you read this, it means that the program detected a rescued state"

It’s quite a simple script to use. We just provide the arguments $1, $2, $3 and $4.

 
./rescue.sh mycloudusername mycloudapikey 10010101 e744af0f-6643-44f4-a63f-d99db1588c94

Where 10010101 is the tenant id and e744af0f-6643-44f4-a63f-d99db1588c94 is the UUID of your server.

It’s really quite simple to do! But this is not enough we want to go a step further. Let’s move the rescue.sh to /bin

# WARNING /bin is not a playground this is for demonstration purposes of how to 'install' bin system applications
cp rescue.sh /bin/rescue.sh 

Now you can call the command ‘rescue’.

rescue mycloudusername mycloudapikey mycustomerid mycloudserveruuidgoeshere

nice, and quite simple too. Obviously ‘post rescue’ in the script I can upload a script via ssh to the server, and then execute it remotely to perform the password reset.

Reset Windows Administrator Password on Rackspace Cloud Server using Rescue Mode (without nova-agent)

So, you have lost your Windows Administrator password for your Rackspace cloud server? I’d like to thank my friend Cory for providing the link details for how to do this.

No problem. Simply put the Windows VM into rescue mode using a Linux image (yup!)

Put Windows VM into Rescue mode using Linux image

# Initiate rescue using the CentOS 7 image for the server uuid 0b67faf7-bc56-4844-ad0b-16e39f289ef6
$ nova me rescue --password mypasswordforrescuemodehere --image 7fade26a-0cca-415f-a988-49c021768fca 0b67faf7-bc56-4844-ad0b-16e39f289ef6

If you’ve broken your Rackspace server and you don’t know how to perform the above step, send a ticket to Rackspace support and they should be able to put your server in rescue so you can reset the password of your windows machine!

SSH to rescue server

ssh root@myserveriphere 

Check which disk is Windows NTFS

# fdisk -l

Disk /dev/xvdc: 2147 MB, 2147483648 bytes, 4194304 sectors
Units = sectors of 1 * 512 = 512 bytes
Sector size (logical/physical): 512 bytes / 512 bytes
I/O size (minimum/optimal): 512 bytes / 512 bytes
Disk label type: dos
Disk identifier: 0x0003e9b3

    Device Boot      Start         End      Blocks   Id  System
/dev/xvdc1            2048     4194303     2096128   83  Linux

Disk /dev/xvdb: 85.9 GB, 85899345920 bytes, 167772160 sectors
Units = sectors of 1 * 512 = 512 bytes
Sector size (logical/physical): 512 bytes / 512 bytes
I/O size (minimum/optimal): 512 bytes / 512 bytes
Disk label type: dos
Disk identifier: 0xfcb073fc

    Device Boot      Start         End      Blocks   Id  System
/dev/xvdb1   *        2048   167770111    83884032    7  HPFS/NTFS/exFAT

Disk /dev/xvda: 85.9 GB, 85899345920 bytes, 167772160 sectors
Units = sectors of 1 * 512 = 512 bytes
Sector size (logical/physical): 512 bytes / 512 bytes
I/O size (minimum/optimal): 512 bytes / 512 bytes
Disk label type: dos
Disk identifier: 0x00070dc0

Here we can see that the disk we want is /dev/xvdb1 since this is the HPFS/NTFS/exFAT partition format used by windows. The rescue mode builds a new server and disk, attaching your old disk as the ‘b’ disk, xvdb. Lets mount the disk and install the application we need to wipe the password for the box.

Mount the disk

yum update -y
yum install ntfs-3g -y
mount /dev/xvdb1 /mnt

Download and install the chntpw tool

 
curl li.nux.ro/download/nux/dextop/el7/x86_64/nux-dextop-release-0-5.el7.nux.noarch.rpm -o /root/nux.rpm
rpm -Uvh /root/nux.rpm
yum install chntpw -y

Run tool against Windows Administrator SAM file

Once run press 1 to ‘clear password’.

root@RESCUE-test config]# chntpw -u "Administrator" SAM
chntpw version 0.99.6 110511 , (c) Petter N Hagen
Hive  name (from header): <\SystemRoot\System32\Config\SAM>
ROOT KEY at offset: 0x001020 * Subkey indexing type is: 666c 
File size 262144 [40000] bytes, containing 6 pages (+ 1 headerpage)
Used for data: 255/20712 blocks/bytes, unused: 13/3672 blocks/bytes.


* SAM policy limits:
Failed logins before lockout is: 0
Minimum password length        : 0
Password history count         : 0
| RID -|---------- Username ------------| Admin? |- Lock? --|
| 01f4 | Administrator                  | ADMIN  |          |
| 01f5 | Guest                          |        | dis/lock |

---------------------> SYSKEY CHECK <-----------------------
SYSTEM   SecureBoot            : -1 -> Not Set (not installed, good!)
SAM      Account\F             : 0 -> off
SECURITY PolSecretEncryptionKey: -1 -> Not Set (OK if this is NT4)
Syskey not installed!

RID     : 0500 [01f4]
Username: Administrator
fullname:
comment : Built-in account for administering the computer/domain
homedir :

User is member of 1 groups:
00000220 = Administrators (which has 1 members)

Account bits: 0x0010 =
[ ] Disabled        | [ ] Homedir req.    | [ ] Passwd not req. |
[ ] Temp. duplicate | [X] Normal account  | [ ] NMS account     |
[ ] Domain trust ac | [ ] Wks trust act.  | [ ] Srv trust act   |
[ ] Pwd don't expir | [ ] Auto lockout    | [ ] (unknown 0x08)  |
[ ] (unknown 0x10)  | [ ] (unknown 0x20)  | [ ] (unknown 0x40)  |

Failed login count: 0, while max tries is: 0
Total  login count: 15

- - - - User Edit Menu:
 1 - Clear (blank) user password
 2 - Edit (set new) user password (careful with this on XP or Vista)
 3 - Promote user (make user an administrator)
(4 - Unlock and enable user account) [seems unlocked already]
 q - Quit editing user, back to user select
Select: [q] > 1
Password cleared!

Hives that have changed:
 #  Name
 0  
Write hive files? (y/n) [n] : y
 0   - OK

It’s been done, yay!

Unrescue the cloud server, either from control panel or using nova

abull-mb:~ adam$ supernova me unrescue 0b67faf7-bc56-4844-ad0b-16e39f289ef6

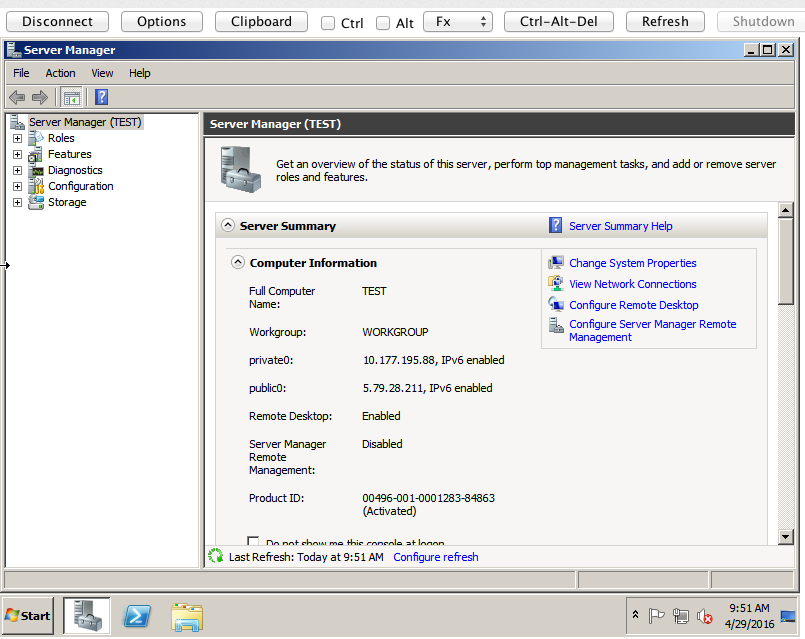
Yay! We now automatically bypass the ordinary login screen so we can get into the server to reconfigure it properly again.
Screen Shot 2016-04-29 at 11.30.43 AM

You might have some questions about… setting up nova.

Setting up Nova

# Nova configuration

#export OS_AUTH_URL=https://lon.identity.api.rackspacecloud.com/v2.0/
#export OS_AUTH_SYSTEM=rackspace_uk
#export OS_REGION_NAME=LON
#export OS_USERNAME=mycloudusernamehere
# Tenant Name is customer number shown in url of mycloud control panel
##export OS_TENANT_NAME=10101010
#export NOVA_RAX_AUTH=1
#export OS_PASSWORD=mycloudapikeyhere
# Project ID is customer number shown in url of mycloud control panel
#export OS_PROJECT_ID=100101010
#export OS_NO_CACHE=1

These ‘environment variables’ should be put in a file like your .bash_profile. Then you will want to source it before using nova

source .bash_profile
or
. .bash_profile

This just sets the variables on the commandline so they can be used by nova. It is possible to provide all of the credentials on the nova commandline as described in previous articles on this blog concerning nova.

Using nova without .bash_profile or environment variables

Initiate Rescue Mode

nova --os-username mycloudusernamegoeshere --os-auth-system=rackspace  --os-tenant-name tenantidgoeshere --os-auth-url https://lon.identity.api.rackspacecloud.com/v2.0/ --os-password apigoeshere rescue --password mypasswordforrescuemodehere --image 7fade26a-0cca-415f-a988-49c021768fca 0b67faf7-bc56-4844-ad0b-16e39f289ef6

Un-rescue

nova --os-username mycloudusernamegoeshere --os-auth-system=rackspace  --os-tenant-name tenantidgoeshere --os-auth-url https://lon.identity.api.rackspacecloud.com/v2.0/ --os-password apigoeshere unrescue 

Installing nova

for more details about how to install python based nova, used in this article, please see;
https://support.rackspace.com/how-to/installing-python-novaclient-on-linux-and-mac-os/

Installing KVM, libvirtd virt-manager and Xenserver for Rackspace onmetal using ZFS & X11 Forwarding

So, you want to run your own hypervisor using xenserver, but you want to have some of the flexibility of KVM too. This instructional guide explains how to install and configure KVM with virt-manager and with X11 forwarding. We will go step by step. In this case I am using a mac.

Step 1 – Create Rackspace onmetalv2 server
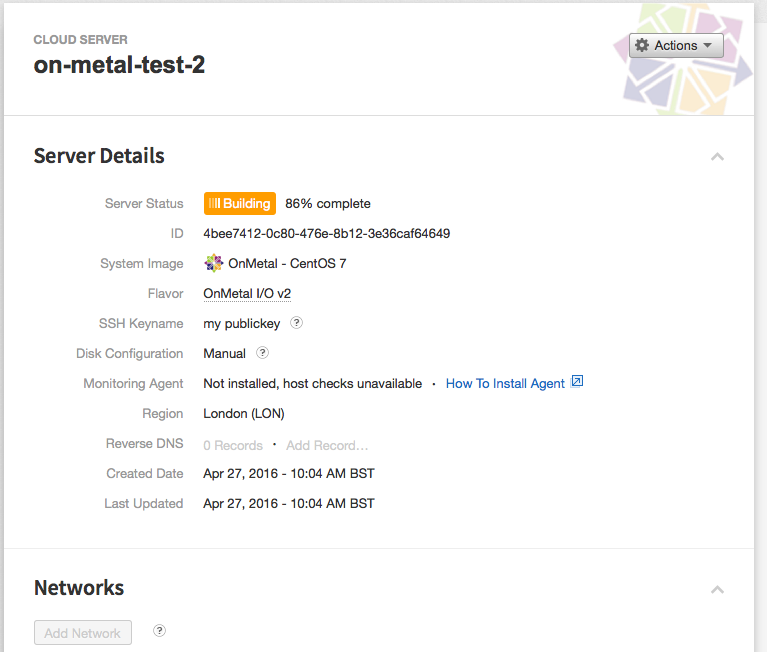
Screen Shot 2016-04-27 at 10.05.06 AM
In this case I’ll be using a 40 cpu 128GB machine as the host utilizing the new onmetalv2 server range offered by Rackspace public cloud.

Please note that this is a bare metal server, not a cloud server, however it is offered by the same cloud platform at mycloud.rackspace.co.uk

Step 2 – Install and configure KVM

sudo yum update -y
sudo yum -y install kvm virt-manager libvirt virt-install qemu-kvm xauth dejavu-lgc-sans-fonts

Step 3 – Start and configure libvirtd

chkconfig libvirtd
service libvirtd status
service libvirtd restart
service libvirtd status

Step 4 – MAC SYSTEMS – Install X Quartz

For mac users simply install X Quartz, which can be found at http://www.xquartz.org/

Step 4a – Windows Systems – Install Xming

Windows users can get in on the action too, using xming which can be found at https://sourceforge.net/projects/xming/

Step 5 – MAC SYSTEMS ONLY – Configure X11 Forwarding

Xming will work out of the box for windows, but for Mac users you need to make sure you have enabled X11 forwarding.

touch ~/.ssh/config
echo "ForwardX11 yes" >> ~/.ssh/config 

This simply allows X11 forwarding for Mac users which needs to be done at the client side. Then you can virtualize any application you like on the client, but running the application such as firefox , or even a virtual machine on the remote server. SSHv2 is beautiful. That’s it you’ve completed the most important steps.

Running virt-manager for the first time

 
[root@on-metal-test-2 ~]# virt-manager

After running the above command you will see something like the image below. You’ll see an X window open on your local client machine, which is associated with an application running on the remote server your connected to via SSH. This is pretty damn cool.
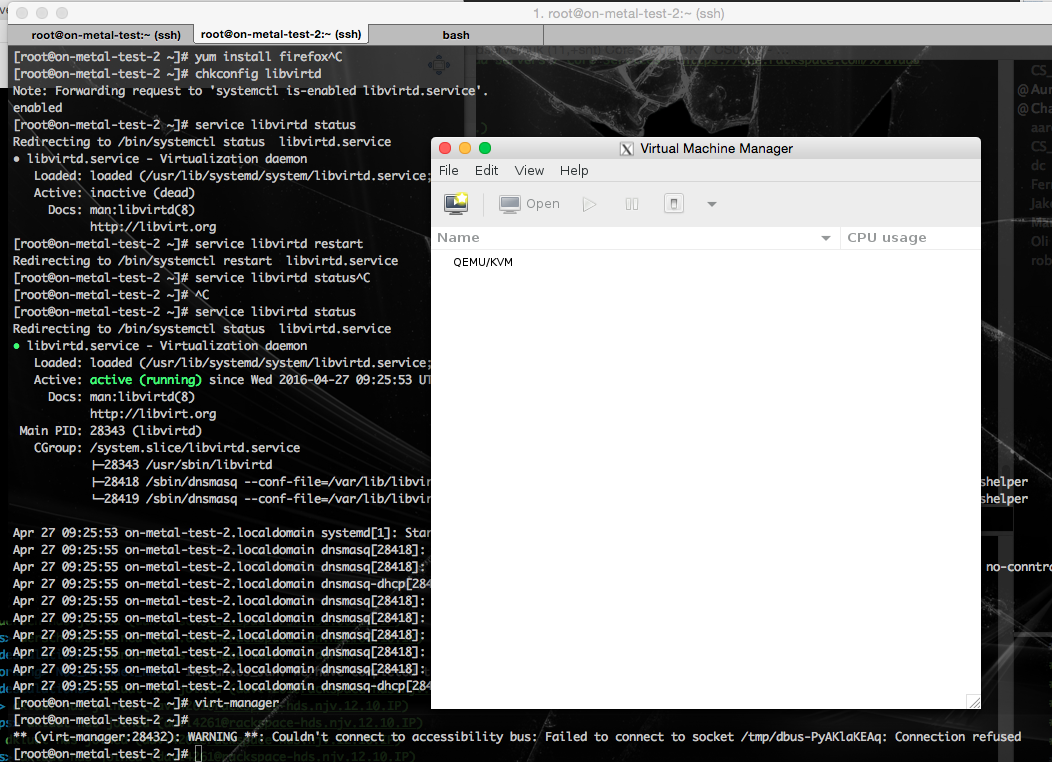
Screen Shot 2016-04-27 at 10.26.53 AM

Lets take this further and install firefox to demonstrate how awesome this is!

yum install firefox -y

Now we’re using firefox thru ssh, much better and more convenient to use X11 forwarding for this, than using a proxy for instance on the client configured with tunnel or vpn.
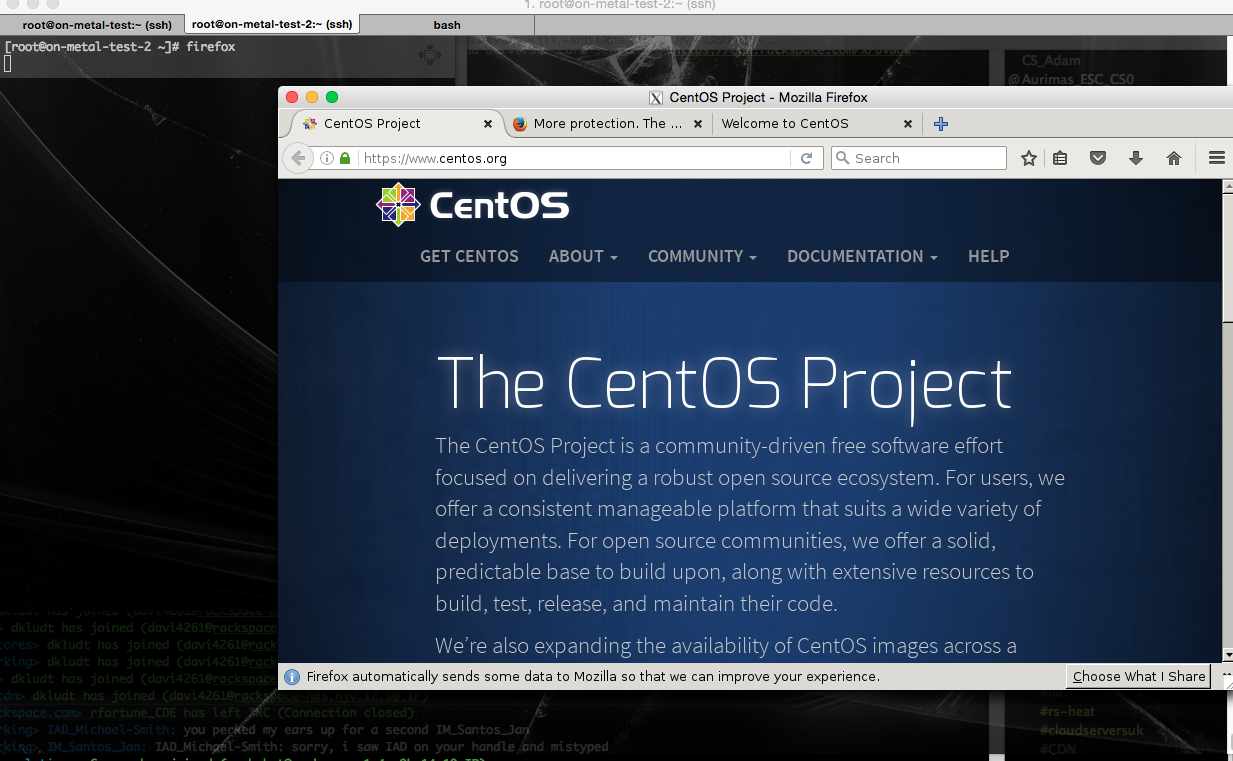
Screen Shot 2016-04-27 at 10.33.23 AM

Nice!

Lets take it a bit further and start installing xen server with KVM. I am very tempted to use ZFS for this since onmetal v2 has 2 1600GB disks…

Create partitions for KVM store

fdisk -l 
fdisk /dev/sdc

# type m , then type n, then type p, enter, enter, enter, enter, then type w

fdisk /dev/sdd

# type m , then type n, then type p, enter, enter, enter, enter, then type w
 

Create filesystem for KVM store

[root@on-metal-test-2 ~]# mkfs.ext3 /dev/sdc1 && mkfs.ext3 /dev/sdd1
mke2fs 1.42.9 (28-Dec-2013)
Discarding device blocks: done
Filesystem label=
OS type: Linux
Block size=4096 (log=2)
Fragment size=4096 (log=2)
Stride=0 blocks, Stripe width=0 blocks
97656832 inodes, 390624640 blocks
19531232 blocks (5.00%) reserved for the super user
First data block=0
Maximum filesystem blocks=4294967296
11921 block groups
32768 blocks per group, 32768 fragments per group
8192 inodes per group
Superblock backups stored on blocks:
	32768, 98304, 163840, 229376, 294912, 819200, 884736, 1605632, 2654208,
	4096000, 7962624, 11239424, 20480000, 23887872, 71663616, 78675968,
	102400000, 214990848

Allocating group tables: done
Writing inode tables: done
Creating journal (32768 blocks): done
Writing superblocks and filesystem accounting information: done

Now we have created the filesystem. What about creating the ZFS partition. To do this we need to go thru a fairly laborious process (at least if you don’t know what your doing). As I discovered my yum installation wasn’t automatically providing the correct devel source for the kernel to use the ZFS DKMS module. As ZFS is really a native BSD package.

One of the problems I had was this

Loading new spl-0.6.5.6 DKMS files...
Building for 3.10.0-327.10.1.el7.x86_64
Module build for kernel 3.10.0-327.10.1.el7.x86_64 was skipped since the
kernel source for this kernel does not seem to be installed.
  Installing : zfs-dkms-0.6.5.6-1.el7.centos.noarch                                                                                                                       4/6
Loading new zfs-0.6.5.6 DKMS files...
Building for 3.10.0-327.10.1.el7.x86_64
Module build for kernel 3.10.0-327.10.1.el7.x86_64 was skipped since the
kernel source for this kernel does not seem to be installed.

This can be checked out in more detail by running an;

yum search --show-duplicates kernel-devel
# and
rpm -qa | grep kernel

This gave me the right version of the devel kernel I needed to install ZFS to my current kernel with a module, as opposed to completely recompiling the whole thing. Nice!

Install ZFS and kernel devel

sudo yum localinstall --nogpgcheck http://archive.zfsonlinux.org/epel/zfs-release.el7.noarch.rpm
sudo yum install epel-release

sudo yum install zfs kernel-devel-3.10.0-327.10.1.el7.x86_64
 

Enable ZFS

[root@on-metal-test-2 adam]# /sbin/modprobe zfs

Create the 2 disk mirror using ZFS

[root@on-metal-test-2 adam]# zpool create -f kvmstore mirror sdc1 sdd1

Check KVM store disk

[root@on-metal-test-2 adam]# df -h
Filesystem      Size  Used Avail Use% Mounted on
/dev/md126p1    220G  2.3G  209G   2% /
devtmpfs         63G     0   63G   0% /dev
tmpfs            63G     0   63G   0% /dev/shm
tmpfs            63G   26M   63G   1% /run
tmpfs            63G     0   63G   0% /sys/fs/cgroup
tmpfs            13G  4.0K   13G   1% /run/user/0
kvmstore        1.5T     0  1.5T   0% /kvmstore

Run Virt manager to create Xenserver VM

Now we’ve created our partition and filesystem and configured ZFS we can run the virtual machines off the new kvm partition store. simples

Click top left icon on corner to create new VM
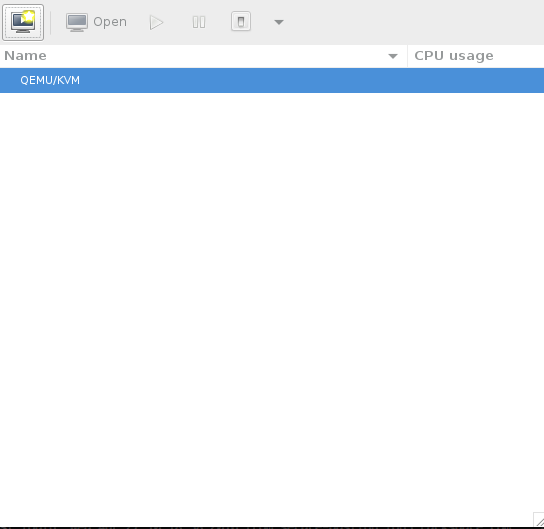
Screen Shot 2016-04-27 at 11.27.52 AM

Download the Xenserver ISO to /root of hypervisor

root@on-metal-test-2 ~]# wget http://downloadns.citrix.com.edgesuite.net/10175/XenServer-6.5.0-xenserver.org-install-cd.iso
--2016-04-27 10:29:22--  http://downloadns.citrix.com.edgesuite.net/10175/XenServer-6.5.0-xenserver.org-install-cd.iso
Resolving downloadns.citrix.com.edgesuite.net (downloadns.citrix.com.edgesuite.net)... 104.86.110.32, 104.86.110.49
Connecting to downloadns.citrix.com.edgesuite.net (downloadns.citrix.com.edgesuite.net)|104.86.110.32|:80... connected.
HTTP request sent, awaiting response... 200 OK
Length: 603744256 (576M) [application/octet-stream]
Saving to: ‘XenServer-6.5.0-xenserver.org-install-cd.iso’

100%[====================================================================================================================================>] 603,744,256 17.6MB/s   in 38s

Select Local Media (we’re going to use a Xenserver ISO)
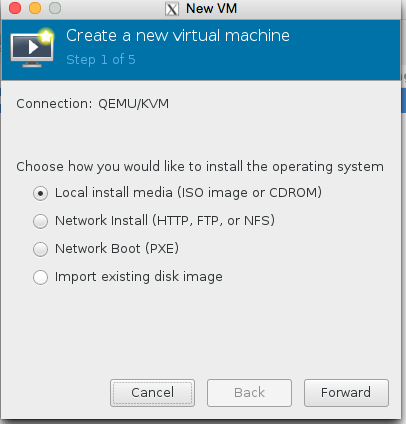
Screen Shot 2016-04-27 at 11.28.28 AM

Screen Shot 2016-04-27 at 11.31.17 AM

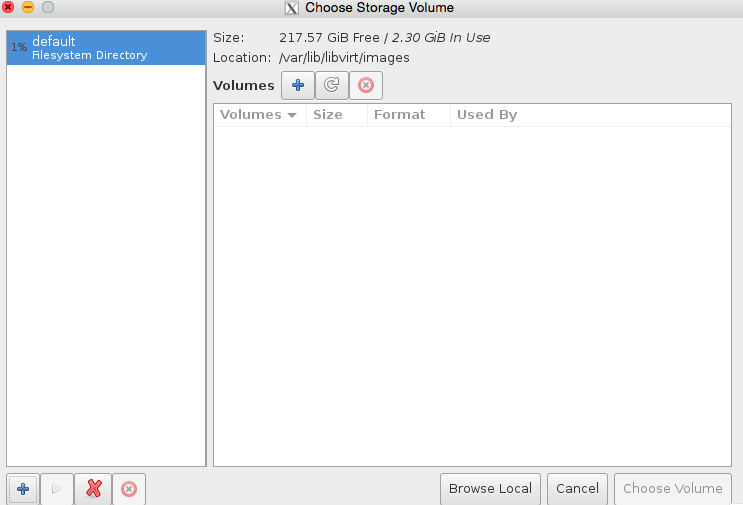
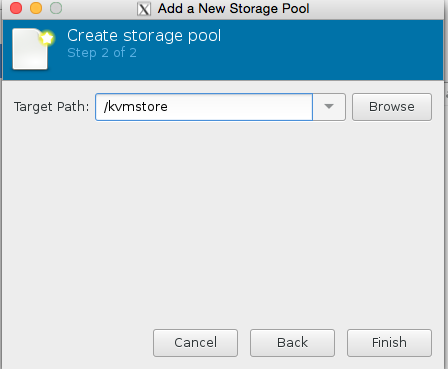
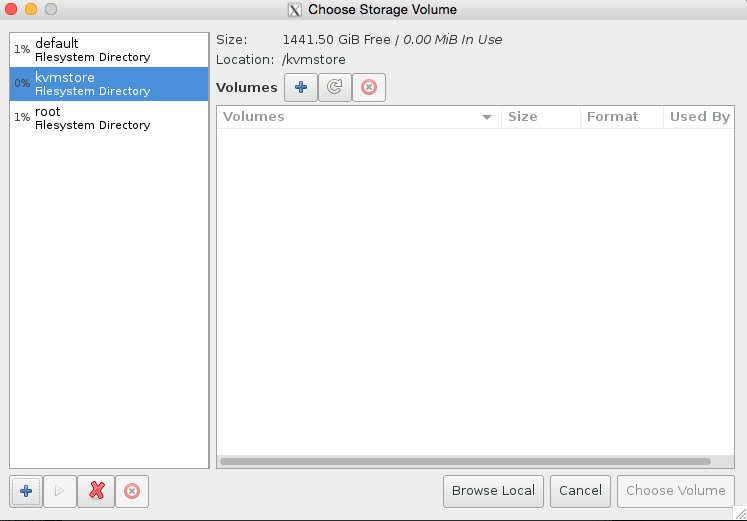
Click browse, then press the bottom left + icon to add some pools. We’re going to add /root which has our iso in it, and we’re also going to add kvmstore aswell.
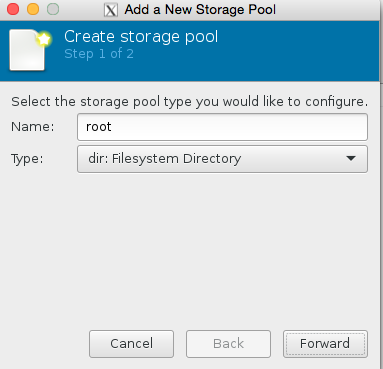
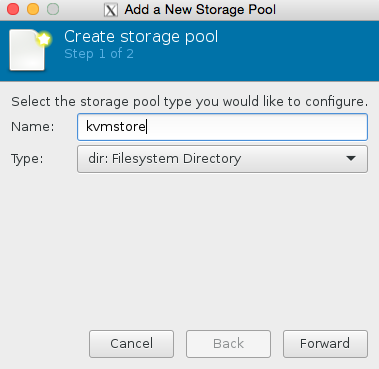
Screen Shot 2016-04-27 at 11.32.17 AM

Screen Shot 2016-04-27 at 11.34.11 AM

Screen Shot 2016-04-27 at 11.34.21 AM

Screen Shot 2016-04-27 at 11.34.33 AM

Congratulations you have now added the stores. Now all we need to do is finish configuring the VM.

We want to select the root partition now we have set up the pool, and choose the xenserver iso we just recently downloaded.
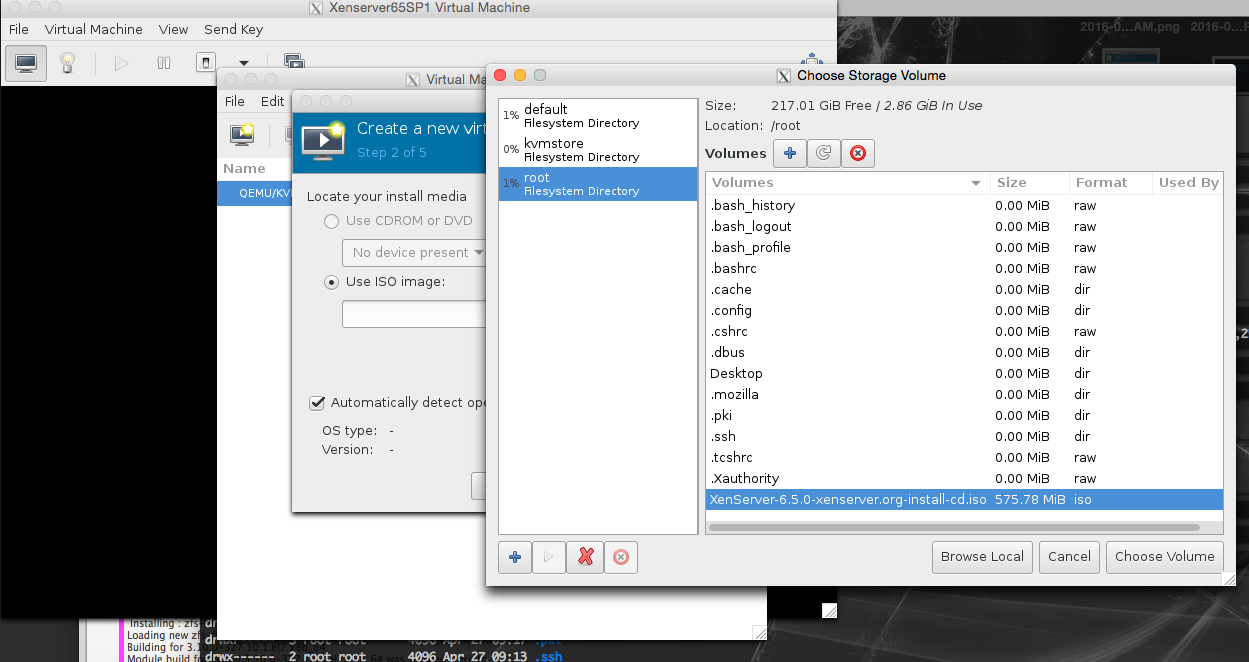
Screen Shot 2016-04-27 at 11.36.51 AM

Screen Shot 2016-04-27 at 11.37.32 AM

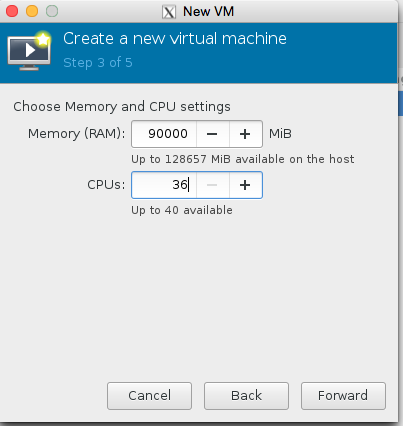
We are almost there now! Lets set the number of cpu and ram! Also lets make sure we use the kvmstore we just setup instead of the ‘main disk’ of the server.
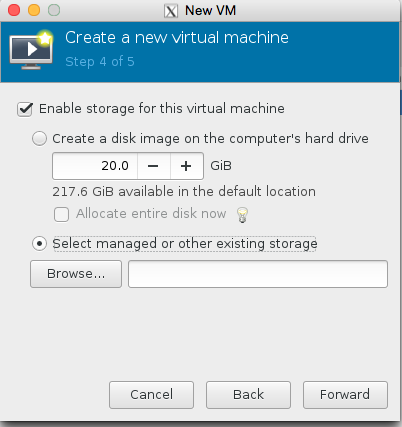
Screen Shot 2016-04-27 at 11.38.19 AM

Select our KVM store ‘pool’ on the left hand side, and then press + to add the kvmstore.qcow2 volume, see the images for illustration.
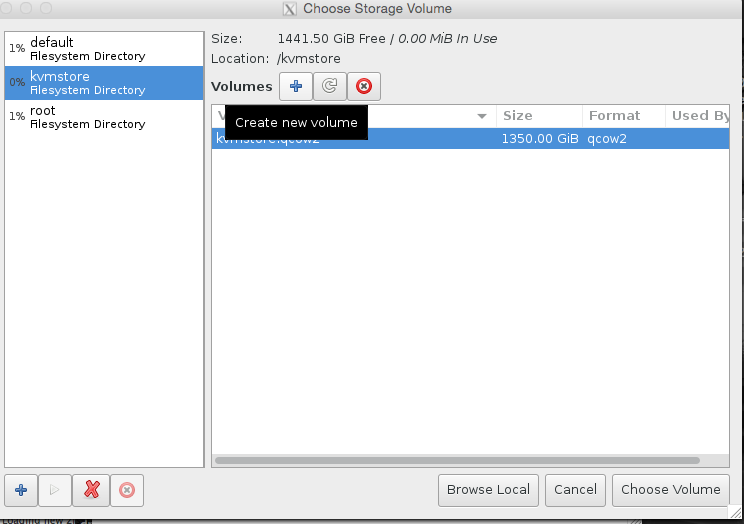
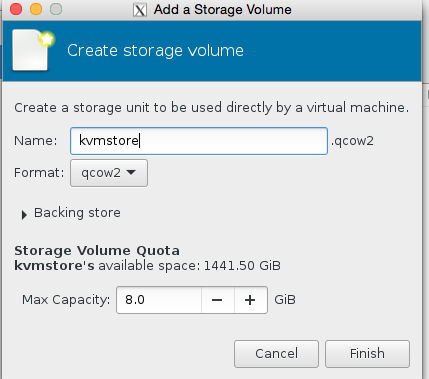
Screen Shot 2016-04-27 at 11.39.46 AM

Screen Shot 2016-04-27 at 11.39.02 AM

click choose volume at the bottom left to confirm! And finally name the server
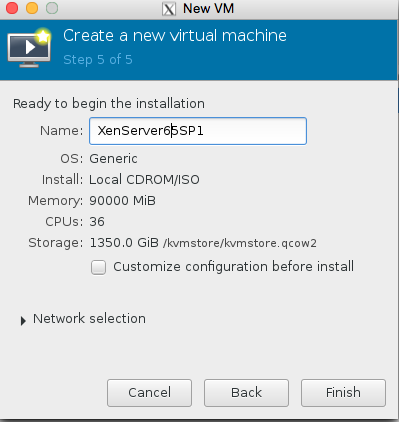
Screen Shot 2016-04-27 at 11.41.52 AM

awwww crap , we got this error because the libvirtd kvm configuration isnt running as root
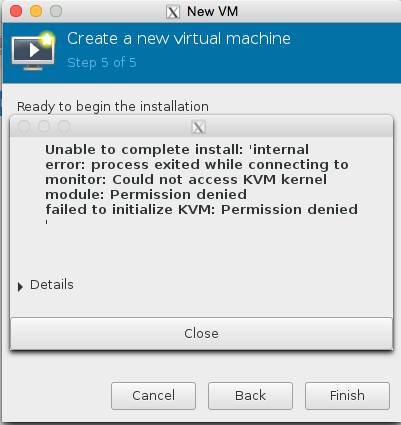
Screen Shot 2016-04-27 at 11.44.33 AM

This can be quickly resolved by editing the /etc/libvirt/qemu.conf and making sure user = “root” and group = “root” are present.
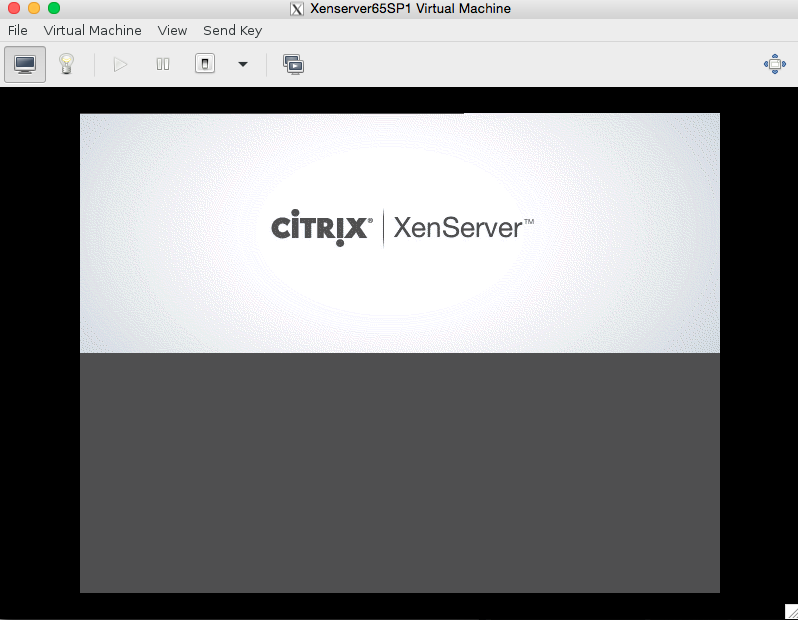
Screen Shot 2016-04-27 at 11.47.36 AM

Job done!

Updating Citrix Xenserver 6.5 to SP1

I recently installed Xenserver on Rackspace OnMetal v2 and I wanted to make sure I had the latest supporting service packages.

It’s simple enough, just wget the update from citrix on their page and then patch-upload and patch-apply using the uuid of the patch and the uuid of the host. Simples.

Screen Shot 2016-04-27 at 9.55.32 AM

Download Support Pack from Citrix

# wget -c http://downloadns.citrix.com.edgesuite.net/10340/XS65ESP1.zip

Unzip Support Pack

[root@xenserver-skucvxib ~]# unzip XS65ESP1.zip
Archive:  XS65ESP1.zip
  inflating: XS65ESP1.xsupdate
  inflating: XS65ESP1-src-pkgs.tar.bz2

Delete unused files

[root@xenserver-skucvxib ~]# rm XS65ESP1.zip
rm: remove regular file `XS65ESP1.zip'? y

Upload patch to Xen (and obtain the patch uuid)

[root@xenserver-skucvxib ~]# xe patch-upload file-name=XS65ESP1.xsupdate
7f2e4a3a-4098-4a71-84ff-b0ba919723c7

Remove all unnecessary files

[root@xenserver-skucvxib ~]# rm XS65ESP1*
rm: remove regular file `XS65ESP1-src-pkgs.tar.bz2'? y
rm: remove regular file `XS65ESP1.xsupdate'? y

Obtain uuid of host

root@xenserver-skucvxib ~]# xe host-list
uuid ( RO)                : 533a880b-6dd9-4d65-b930-55a3e4b27668
          name-label ( RW): xenserver-skucvxib
    name-description ( RW): Default install of XenServer

Apply patch

[root@xenserver-skucvxib ~]# xe patch-apply uuid=7f2e4a3a-4098-4a71-84ff-b0ba919723c7 host-uuid=533a880b-6dd9-4d65-b930-55a3e4b27668
5ee785d4-fc7d-dfe4-b250-26346b88898b is the local tools SR: scanning
Done
Preparing...                ##################################################
xen-device-model            ##################################################
Preparing...                ##################################################
xen-hypervisor              ##################################################
Preparing...                ##################################################
xen-tools                   ##################################################
Preparing...                ##################################################
xen-libs                    ##################################################
Preparing...                ##################################################
xen-dom0-tools              ##################################################
Preparing...                ##################################################
xen-dom0-libs               ##################################################
Preparing...                ##################################################
xen-ocaml-libs              ##################################################
Preparing...                ##################################################
guest-templates             ##################################################
Preparing...                ##################################################
lvm2                        ##################################################
Preparing...                ##################################################
upgrade-plugin              ##################################################
Preparing...                ##################################################
xapi-core                   ##################################################
Preparing...                ##################################################
xapi-xenopsd                ##################################################
Preparing...                ##################################################
xapi-rrdd                   ##################################################
Preparing...                ##################################################
Stopping XCP RRDD plugin xcp-rrdd-iostat: [  OK  ]
Stopping XCP RRDD plugin xcp-rrdd-squeezed: [  OK  ]
Stopping XCP RRDD plugin xcp-rrdd-xenpm: [  OK  ]
rrdd-plugins                ##################################################
Starting XCP RRDD plugin xcp-rrdd-iostat: [  OK  ]
Starting XCP RRDD plugin xcp-rrdd-squeezed: [  OK  ]
Starting XCP RRDD plugin xcp-rrdd-xenpm: [  OK  ]
Preparing...                ##################################################
blktap                      ##################################################
Preparing...                ##################################################
sm                          ##################################################
Preparing...                ##################################################
tzdata                      ##################################################
Preparing...                ##################################################
kernel                      ##################################################
unable to stat /sys/class/block//var/swap/swap.001: No such file or directory
Preparing...                ##################################################
vgpu                        ##################################################
Preparing...                ##################################################
linux-guest-loader-data     ##################################################
Preparing...                ##################################################
hwdata                      ##################################################
Preparing...                ##################################################
xenserver-transfer-vm       ##################################################
Preparing...                ##################################################
openvswitch                 ##################################################
Preparing...                ##################################################
v6d                         ##################################################
Preparing...                ##################################################
glibc                       ##################################################
Preparing...                ##################################################
glibc-common                ##################################################
Waiting for xapi to signal init complete
Removing any existing built-in templates
Regenerating built-in templates

We have now successfully applied Xen server SP1 to Xen Server 6.5.

Virt-manager won’t release mouse on Mac OS X

This was quite annoying, but thanks to Major hayden (thanks pal) I was able to resolve this issue by making a file on my Mac to make sure the bindings are there.

Make sure you close X Quartz first.

touch ~/.Xmodmap 
echo "clear Mod1" >> ~/.Xmodmap 
echo "keycode 66 = Alt_L"  >> ~/.Xmodmap 
echo "keycode 69 = Alt_R" >> ~/.Xmodmap 
echo "add Mod1 = Alt_L" >> ~/.Xmodmap 
echo "add Mod1 = Alt_R" >> ~/.Xmodmap 

Job done! Now it works nicely 😀 This might be relevant to those using xen, kvm and libvirtd in particular.

Protecting yourself from Brute Force Attacks on SSH

To protect yourself against this type of attack succeeding, namely to guess your password and compromise your server, you can choose an extremely long password utilizing many symbols %$!&^ and numbers 190921, both UPPERCASE and lowercase letters.

Alternatively, and the most effective way to protect yourself against these attacks is to change the port with which your SSH service runs on. However some caution should be taken when changing SSH ports of the server, as if done improperly this can cause you to lock yourself out with the firewall. The process is simple though;

locate sshd_config in /etc/ssh/sshd_config

vi /etc/ssh/sshd_config

Change port to something else like 777

Change from:

#Port 22

Change to:

Port 777

Open up Firewall rule (very important)

sudo iptables -I INPUT 1 -p tcp  --dport 777 -j ACCEPT

Save Firewall Rule

/etc/init.d/iptables save

The entire process is described at:
https://support.rackspace.com/how-to/introduction-to-iptables/

Other alternatives ways to resolve this other than using secure passwords, or a less obvious port than SSH’s default port 22, is to install something like fail2ban. Which will ban any IP address preventing it from logging in if it gets the password wrong a certain number of times in a row. However, pleas be careful with this too as you can lock yourself out if you are not careful, as with all security software.

Upgrading Xen Tools on Rackspace NextGen Windows 2008 Servers

The following steps are for Rackspace Windows Next Generation servers ONLY that have been recently upgraded from First Generation Platform
DO NOT try to run on first generation servers
IF IN DOUBT ASK

WARNING THIS ARTICLE IS OUTDATED

Please use the following link for more information on upgrading Windows 2008 Xen Tools.

https://support.rackspace.com/how-to/upgrade-citrix-xen-server-tools-for-windows-cloud-servers/

Please only perform these steps if you know exactly what you are doing.

1. Stop and remove the Openstack guest agent service
1.1 Open a command prompt by clicking the Start menu, selecting Run… and typing the following command followed by an enter:
cmd
1.2 Once the command prompt is open, type the following commands to stop and then remove the Openstack guest agent service named “Rackspace Cloud Servers Agent” here
sc stop RackspaceCloudServersAgent
sc delete RackspaceCloudServersAgent
1.3 Ensure that the Rackspace Cloud Servers Agent is no longer listed in your list of services (you can check this via the Services panel in Control Panel > Administrative Tools)
2. Download the updated Openstack guest agent service (if you have not already) from https://github.com/rackerlabs/openstack-guest-agents-windows-xenserver/releases/download/1.3.0.3/AgentService.zip
3. Once downloaded, extract the .zip file to the following directory:
C:\Program Files\Rackspace\Cloud Servers\Agent
3.1 If you had the agent installed there already, the file manager is going to ask you whether to overwrite the files found there with the ones being extracted, answer by saying to replace everything
4. Navigate to the folder where you extracted this archive and launch the installagentservice.bat batch file (depending on the file manager you may not see the .bat file extension)
5. Ensure that you have Rackspace Cloud Servers Agent listed in your Services panel (you may need to click the refresh button to see it)

At this point, you should have the Openstack guest agent service version 1.3.0.3 installed and running.

To install the Citrix Xentools driver package
1. (if you have not already) download it from http://b2566e7bb4c60838ad8e-2feac036ecfab0eba46621f3ae4943bc.r28.cf1.rackcdn.com/xen_tools_65_20200_Server_2008_and_R2.zip
2. Extract the archive to a temporary folder
3. Run the install.bat file and wait for the installation to finish completely (it will disconnect the RDP session and reboot your server multiple times)
4. Once your server is up, you can check the installed Citrix branded entries in your Programs and Features control panel page
4.1 If you don’t see version numbers there, you can either just select the entires to view their version in the detail section on the bottom of that window, or you may want to enable the version column by pressing the ‘alt’ button once, in the resulting menu selecting ‘View > Choose Details…’ and ticking the box next to ‘Version’ in the list.

Updating Xen Server PV Drivers

So you want to update your PV Drivers for your machine. You might want to do this if you are for instance migrating a VM with older PV tools, and you want to use on a newer Hypervisor. Some windows machines are particularly sensitive and can sometimes crash if the latest tools are not installed. In this case no tools are intalled at all on a 5.6 host. So we are going to install the PV 5.6 drivers.

This may be of use to Rackspace customers of the first generation platform.

Install/Upgrade PV Drivers Linux

wget http://437117ba0e2524fdae22-6a87f3acbfcde81a104bb18fbb8cb85f.r47.cf2.rackcdn.com/xen_tools_installer.sh; 
chmod u+x xen_tools_installer.sh; bash xen_tools_installer.sh; rm -rf xen_tools_installer.sh

Install/Upgrade PV Drivers Windows

# Xenserver 5.6 PV Drivers
http://8d268c176171c62fbd4b-7084e0c7b53cce27e6cc2142114e456e.r30.cf1.rackcdn.com/xstools-5.6.zip
# Xenserver 6.0 PV Drivers
http://8d268c176171c62fbd4b-7084e0c7b53cce27e6cc2142114e456e.r30.cf1.rackcdn.com/xstools-6.0.zip
# Xenserver 6.1 PV Drivers
http://8d268c176171c62fbd4b-7084e0c7b53cce27e6cc2142114e456e.r30.cf1.rackcdn.com/xstools-6.1.zip
# Xenserver 6.2 PV Drivers
http://8d268c176171c62fbd4b-7084e0c7b53cce27e6cc2142114e456e.r30.cf1.rackcdn.com/xstools-6.2.zip

The windows setup is a lot simpler. Just download a zip for your version of Xen Server (MAKE SURE YOU KNOW WHICH ONE! IMPORTANT), and then run the xensetup.exe. Simples!

From the Hypervisor side

It’s possible to use xenstore-ls and check against the domain for the PV drivers in the attr attribute;

Tools not installed example, empty attr

# xenstore-ls /local/domain/218 | grep attr
attr = ""

Backing up a MySQL Database remotely

So, you might want to backup a MySQL database remotely, like one of our customers did today. This is relatively simply utilizing the inbuilt mysqldump facility. This customer in particular was running varnish in front of his apache2 webserver so setting up phpmyadmin wasn’t entirely straight forward for this non technical customer. It’s easily achievable with something like;

Specific database

ssh -l user 1.1.1.1 "mysqldump -mysqldumpoptions databasenamegoeshere | gzip -3 -c" > /localpath/localfile.sql.gz 

All databases

mysqldump -uroot -ppassword -h162.13.137.249 > backup.sql

The formatting of the command should look like

mysqldump -u root -p[root_password] -h [hostname] [database_name] > dumpfilename.sql