Converting a QEMU qcow2 cloud server image to an native disk img and putting on physical disk

Got this question at work a lot. Thought I’d finally get around to putting it down since it’s came up for me. I’ve got a virtual machine using virtio passthrough for my pcie, and I found actually that disk access via the qcow2 is pretty naff.

sudo apt-get install qemu-kvm

qemu-img convert windows10cloudimage.qcow2 -O raw diskimage.img

dd if=/path/to/windos10cloudimage.qcow2 of=/dev/sdc2

Please note in my case the physical partition I’d made was sdc2. I’d actually resized another 5TB disk I have in my system using gparted. Just so I can attach a physical partition with libvirtd. Evidently though libvirtd-manager doesn’t allow this business so I have to edit the xlm file in /etc/qemu/windows10.xml .


root@adam:/etc/libvirt/qemu# virsh  define /etc/libvirt/qemu/win10-uefi.xml 
Domain win10-uefi defined from /etc/libvirt/qemu/win10-uefi.xml
root@adam:/etc/libvirt/qemu# virt-manager

yeah baby!


You could alternatively do it all in one like below, though you may desire a copy of the img file as well as putting it to the disk.

qemu-img convert windows10.qcow2 -O raw /dev/sdc

All About NOVA and Xen Tools in Rackspace Cloud – why can’t I connect to my Windows server?

Why can’t I connect to my Rackspace Windows cloud-server, you ask? 2 important questions.

1. Is it a new build?
2. Is it using a custom image (a non rackspace base image).

(because the rackspace base images all have correct nova-agent and xen tools, so get networking information OK. But customer images don’t!). In the case you have run the below tests to see if nova-agent is running (or installed), you will need to install them.

Checking for the nova-agent and xe-guest-utilities

ps auxfwww | grep nova-agent
yum -qa xe-guest-utilities nova-agent
dpkg -l xe-guest-utilities nova-agent

Explanation and solution

Thanks for reaching out to us with your inquiry today. I’m glad to convey to you that I understand what the problem is with your cloud-server not being contactable.

Main reasons for breakage

The main reason why this is not working is most likely caused by some important pieces of software being missing. There is a piece of software called nova-agent, which is responsible for setting your cloud-servers IPV4 address, network subnet/mask, and ip routes, when it is first built. This is important, since the server image you built the server from, has different network details.

The rackspace build process giving networking detail to the VM is completely dependent on xe-guest-utilities and nova-agent

What has happened in this case, because the nova-agent wasn’t running on the cloud-server, the hypervisor software Rackspace use to automate cloud-server builds wasn’t able to contact the nova-agent running on your cloud-server, and therefore nova-agent wasn’t able to update the networking information. And hence, your not able to connect to it on it’s IPv4 address you are given at build time.

The steps to resolution: installing nova-agent and xen guest utilities
As such, nova-agent needs to be installed on the cloud-server you take the image from, it can be installed as follows:

https://community.rackspace.com/products/f/25/t/5694

Also nova-agent uses another piece of important software called xe-guest-utilities, or (Xen Tools) for your windows servers, this is an important ‘PV’ paravirtualization tools, responsible for seamless management of cloud-servers. Sorry that in this case it’s not working out seamlessly, but this can happen with images taken of servers which have had nova-agent disabled, uninstalled, or similar.

Upgrading the tools that nova-agent depends upon, can be installed by following the instructions at the following location:

https://support.rackspace.com/how-to/upgrade-citrix-xen-server-tools-for-windows-cloud-servers/

# Options of how to do this / Summary of Solution Steps

Naturally, you might be wondering how to achieve these changes, if you cannot RDP to the server. This is quite understandable, there are two ways to get this working;

Option 1) Manually install nova-agent on the current server you cannot access, then manually install the Xen Tools in the same way. This shall fix the OS on the server itself, and not the original image you built the server from. So it is important to create a new cloud-server image after performing these steps and us verifying tools + nova-agent installed correctly.

2) Manually install nova-agent on the source server you initially taken the image from, and install Xen Tools, then re-image the server, and then re-deploy. This should seamlesssly work each time on build with that image, provided the tools are installed. You will not need to recreate the image, since your fixing the problem on the cloud-server source that the original image was taken from.

I appreciate that these things are not 100% simple to get your head around and can be confusing for customers, I hope my explanation and summary makes this a little more painless to fix. Of course if you have additional questions, comments or concerns or don’t understand something I’ve said, please don’t hesitate to reach out to us, we are here to help!

Installing Rackspace Cloud Backup on a Windows Box

You may be a managed infrastructure customer at Rackspace, which is the infrastructure-only support. Maybe you want to install the Cloud Backup agent, but aren’t sure how. For windows, it really couldn’t be easier. You:

Required Steps
1) Download Cloud Backup Installer
2) Install Cloud Backup, providing, when prompted your
i) cloud username
ii) API KEY

Once the Backup Agent has been installed, it’s possible to start backing up, by configuring Backups in the mycloud control panel. Rackspace can help you schedule backups if you feel uncomfortable doing that part, but as the customer you would want to install the Agent yourselves. Rackspace doesn’t hold credentials or login to managed infrastructure customers machines, so providing you can take care of this part. We can help you do the rest.

# Installing Backup Agent on the Windows Cloud Server

1. Download this link with your browser, right click ‘save target as’ or ‘save link as’, to download the windows Cloud Backup installer.

http://97a6455ef60243cc8c74-57c93634a2c6eae60c16d098c741cf9b.r43.cf1.rackcdn.com/win64/driveclient-latest.msi

2. When installing, the software requests you to provide your cloud username, and the API key. You can find these two pieces of detail under your ‘account settings’ page at the below url:

https://mycloud.rackspace.com/cloud/youraccountnumberhere/account#settings

(You will need to be logged in, and can access account settings from the menu in the top right hand corner of the page)

3. When prompted by the installer, copy paste in your username and API key.

The whole process is described step by step at the below URL:

https://support.rackspace.com/how-to/rackspace-cloud-backup-install-the-agent-on-windows/

Once you have performed these steps you will be able to set backups in the control panel and Rackspace can guide you how to set that up once the agent is installed on your windows server.

Uploading and Mounting ISO for Windows Cloud-server

So a customer came with the question today on the process of uploading an ISO to a cloud-server. It’s a relatively easy process. RDP allows you to use resource sharing, that effectively mounts on the server you RDP to, your remote filesystem of your choice. This is the manner in which you can upload the file easily.

Once you have the ISO on the server you simply need to mount the disk with a software to present it as an ordinary CD/DVD disk. I personally use Elaborate Bytes’ Virtual Clone Drive.

Copying Resources between client and server using RDP resource sharing:
https://support.microsoft.com/en-us/kb/313292

Mounting CD/DVD ISO/CUE/BIN files in Windows
https://www.elby.ch/en/products/vcd.html

Yeah, I know it’s simple to us, but other people might find this useful. Exact same question came up today 😀

Windows Password reset for Rackspace Cloud Servers

In the previous articles Using API and BASH to validate changing conditions and Reset windows administrator password using rescue mode without nova-agent I explained both the steps how to reset the password of a windows VM instance by modifying the SAM file by using a Linux ‘rescue’ image in the cloud, and, I also explained how to automate checks for BASH automation thru the API. The checks specifically waited until the server entered rescue, and then lifted the ipv4 address, connecting only when the rescue server had finished building.

That way the automation is handling the delay it takes, as well as setting and lifting the access credentials and ip address to use each time. Here is the complete script. Please note that backticks are deprecated but I’m a bit ‘oldskool’. This is a rough alpha, but it works really nicely. After testing it consistently allows ourselves, or our customers to reset a Windows Cloud Server password, in the case that a customer loses access to it, and cannot use other Rackspace services to do the reset. This effectively turns a useless server, back into a usable one again and saves a lot of time.

#!/bin/bash
# Adam Bull, Rackspace UK
# This script automates the resetting of windows passwords
# Arguments $1 == username
# Arguments $2 == apikey
# Arguments $3 == ddi
# Arguments $4 == instanceid

echo "Rackspace windows cloud server Password Reset"
echo "written by Adam Bull, Rackspace UK"
sleep 2
PASSWORD=39fdfgk4d3fdovszc932456j2oZ

# Provide an instance uuid to rescue and reset windows password

USERNAME=mycloudusernamehere
APIKEY=myapikeyhere
# DDI is the 'customer ID', if you don't know this login to the control panel and check the number in the URL
DDI=10010101
# The instance uuid you want to rescue
INSTANCE=ca371a8b-748e-46da-9e6d-8c594691f71c

# INITIATE RESCUE PROCESS

nova  --os-username $USERNAME --os-auth-system=rackspace  --os-tenant-name $DDI --os-auth-url https://lon.identity.api.rackspacecloud.com/v2.0/ --os-password $APIKEY --insecure rescue --password "$PASSWORD" --image 7fade26a-0cca-415f-a988-49c021768fca $INSTANCE

# LOOP UNTIL STATE DETECTED AS RESCUED

STATE=0
until [[ $STATE == rescued ]]; do
echo "start rescue check"
STATE=`nova --os-username $USERNAME --os-auth-system=rackspace  --os-tenant-name $DDI --os-auth-url https://lon.identity.api.rackspacecloud.com/v2.0/ --os-password $APIKEY --insecure show $INSTANCE | grep rescued | awk '{print $4}'`

echo "STATE =" $STATE
echo "sleeping.."
sleep 5
done

# EXTRACT PUBLIC ipv4 FROM INSTANCE

IP=`nova --os-username $USERNAME --os-auth-system=rackspace  --os-tenant-name $DDI --os-auth-url https://lon.identity.api.rackspacecloud.com/v2.0/ --os-password $APIKEY --insecure show $INSTANCE | grep public | awk '{print $5}' | grep -oE '((1?[0-9][0-9]?|2[0-4][0-9]|25[0-5])\.){3}(1?[0-9][0-9]?|2[0-4][0-9]|25[0-5])'`
echo "IP = $IP"

# UPDATE AND INSTALL RESCUE TOOLS AND RESET WINDOWS PASS
# Set environment locally
yum install sshpass -y

# Execute environment remotely
echo "Performing Rescue..."
sshpass -p "$PASSWORD" ssh -o StrictHostKeyChecking=no root@"$IP" 'yum update -y; yum install ntfs-3g -y; mount /dev/xvdb1 /mnt; curl li.nux.ro/download/nux/dextop/el7/x86_64/nux-dextop-release-0-5.el7.nux.noarch.rpm -o /root/nux.rpm; rpm -Uvh /root/nux.rpm; yum install chntpw -y; cd /mnt/Windows/System32/config; echo -e "1\ny\n" | chntpw -u "Administrator" SAM'

echo "Unrescuing in 100 seconds..."
sleep 100
nova  --os-username $USERNAME --os-auth-system=rackspace  --os-tenant-name $DDI --os-auth-url https://lon.identity.api.rackspacecloud.com/v2.0/ --os-password $APIKEY --insecure unrescue $INSTANCE

Thanks again to my friend Cory who gave me the instructions, I simply automated the process to make it easier and learned something in the process 😉

Configure Nested KVM for Intel & AMD based Machines

So, we are configuring some openstack and kvm stuff at work for some projects. We’re ‘cloudy’ guys. What can I say? 😀 One Issue I had when installing xenserver, underneath KVM.

(why would we do this?) In our testing environment we’re using a single OnMetal v2 server, and, instead of running xenserver directly on the server, and requiring additional servers, we are using a single 128GB RAM hypervisor for the test environment. One issue though is that Windows is only supported with xenserver when directly run on the ‘host’. Because Xen is running virtualized under KVM we have a problem.

Enter, tested virtualization support. Hardware virtualization assist support will now work for xenserver thru KVM, which means I can boot windows servers. YAY! uh.. 😉 kinda.

Check if Nested hardware virtualization assist is enabled

$cat /sys/module/kvm_intel/parameters/nested
N

It wasn’t 🙁 Lets enable it

Enable nested hardware virtualization assist

sudo rmmod kvm-intel
sudo sh -c "echo 'options kvm-intel nested=y' >> /etc/modprobe.d/dist.conf"
sudo modprobe kvm-intel

Ensure nested hardware virtualization is enabled

cat /sys/module/kvm_intel/parameters/nested
Y

modinfo kvm_intel | grep nested
parm:           nested:bool

It worked!

This can also be done for AMD systems simply substituting kvm_amd.

http://docs.openstack.org/developer/devstack/guides/devstack-with-nested-kvm.html

HOWTO: Rackspace Automation, Using BASH with API (to validate conditions to perform conditional tasks)

In the previous article, I showed how to wipe clean the windows password from a broken Virtual Machine that you were locked out of by rescuing with a Linux image. In this article I explain steps of how you would automate this with a bash script, that looked at the STATE of the server, and accepts commandline arguments.

It’s quite a simple script;

#!/bin/bash
# Adam Bull
# April 28 2016
# This script automates the resetting of windows passwords
# Arguments $1 == instanceuuid
# Arguments $2 == username
# Arguments $3 == apikey

PASSWORD=mypassword

# Provide an instance uuid to rescue and reset windows password

USERNAME=$1
APIKEY=$2
DDI=$3
INSTANCE=$4


nova  --os-username $USERNAME --os-auth-system=rackspace  --os-tenant-name $DDI --os-auth-url https://lon.identity.api.rackspacecloud.com/v2.0/ --os-password $APIKEY --insecure rescue --password mypassword --image 7fade26a-0cca-415f-a988-49c021768fca $INSTANCE

The above script takes the arguments I give the executable script on the commandline, in this case the first argument passed is $1, the Rackspace mycloud username. The second argument the apikey. etc. This basically puts the server into rescue. But.. what if we wanted to run some automation AFTER it rescued? We don’t want to try and let the automation ssh to the box and run the automation early, so we could use a supernova show to find whether the VM state has changed to ‘rescue’. Whilst its initiating the state will be rescuing. So we have the option of using when !rescueing logic, or, when == equal to rescue. Lets use when equal to rescue in our validation loop.

This loop will continue until the task state changes to the desired value. Here is how we achieve it

#!/bin/bash
# Initialize Variable
STATE=0
# Validate $STATE variable, looping UNTIL $STATE == rescued
until [[ $STATE == rescued ]]; do
echo "start rescue check"
# 'show' the servers data, and grep for rescued and extract only the correct value if it is found
STATE=`nova --os-username $USERNAME --os-auth-system=rackspace  --os-tenant-name $DDI --os-auth-url https://lon.identity.api.rackspacecloud.com/v2.0/ --os-password $APIKEY --insecure show $INSTANCE | grep rescued | awk '{print $4}'`

# For debugging
echo "STATE =" $STATE
echo "sleeping.."

# For API Limit control
sleep 5
# Exit the loop once until condition satisfied
done

# Post Rescue
echo "If you read this, it means that the program detected a rescued state"

It’s quite a simple script to use. We just provide the arguments $1, $2, $3 and $4.

 
./rescue.sh mycloudusername mycloudapikey 10010101 e744af0f-6643-44f4-a63f-d99db1588c94

Where 10010101 is the tenant id and e744af0f-6643-44f4-a63f-d99db1588c94 is the UUID of your server.

It’s really quite simple to do! But this is not enough we want to go a step further. Let’s move the rescue.sh to /bin

# WARNING /bin is not a playground this is for demonstration purposes of how to 'install' bin system applications
cp rescue.sh /bin/rescue.sh 

Now you can call the command ‘rescue’.

rescue mycloudusername mycloudapikey mycustomerid mycloudserveruuidgoeshere

nice, and quite simple too. Obviously ‘post rescue’ in the script I can upload a script via ssh to the server, and then execute it remotely to perform the password reset.

Reset Windows Administrator Password on Rackspace Cloud Server using Rescue Mode (without nova-agent)

So, you have lost your Windows Administrator password for your Rackspace cloud server? I’d like to thank my friend Cory for providing the link details for how to do this.

No problem. Simply put the Windows VM into rescue mode using a Linux image (yup!)

Put Windows VM into Rescue mode using Linux image

# Initiate rescue using the CentOS 7 image for the server uuid 0b67faf7-bc56-4844-ad0b-16e39f289ef6
$ nova me rescue --password mypasswordforrescuemodehere --image 7fade26a-0cca-415f-a988-49c021768fca 0b67faf7-bc56-4844-ad0b-16e39f289ef6

If you’ve broken your Rackspace server and you don’t know how to perform the above step, send a ticket to Rackspace support and they should be able to put your server in rescue so you can reset the password of your windows machine!

SSH to rescue server

ssh root@myserveriphere 

Check which disk is Windows NTFS

# fdisk -l

Disk /dev/xvdc: 2147 MB, 2147483648 bytes, 4194304 sectors
Units = sectors of 1 * 512 = 512 bytes
Sector size (logical/physical): 512 bytes / 512 bytes
I/O size (minimum/optimal): 512 bytes / 512 bytes
Disk label type: dos
Disk identifier: 0x0003e9b3

    Device Boot      Start         End      Blocks   Id  System
/dev/xvdc1            2048     4194303     2096128   83  Linux

Disk /dev/xvdb: 85.9 GB, 85899345920 bytes, 167772160 sectors
Units = sectors of 1 * 512 = 512 bytes
Sector size (logical/physical): 512 bytes / 512 bytes
I/O size (minimum/optimal): 512 bytes / 512 bytes
Disk label type: dos
Disk identifier: 0xfcb073fc

    Device Boot      Start         End      Blocks   Id  System
/dev/xvdb1   *        2048   167770111    83884032    7  HPFS/NTFS/exFAT

Disk /dev/xvda: 85.9 GB, 85899345920 bytes, 167772160 sectors
Units = sectors of 1 * 512 = 512 bytes
Sector size (logical/physical): 512 bytes / 512 bytes
I/O size (minimum/optimal): 512 bytes / 512 bytes
Disk label type: dos
Disk identifier: 0x00070dc0

Here we can see that the disk we want is /dev/xvdb1 since this is the HPFS/NTFS/exFAT partition format used by windows. The rescue mode builds a new server and disk, attaching your old disk as the ‘b’ disk, xvdb. Lets mount the disk and install the application we need to wipe the password for the box.

Mount the disk

yum update -y
yum install ntfs-3g -y
mount /dev/xvdb1 /mnt

Download and install the chntpw tool

 
curl li.nux.ro/download/nux/dextop/el7/x86_64/nux-dextop-release-0-5.el7.nux.noarch.rpm -o /root/nux.rpm
rpm -Uvh /root/nux.rpm
yum install chntpw -y

Run tool against Windows Administrator SAM file

Once run press 1 to ‘clear password’.

root@RESCUE-test config]# chntpw -u "Administrator" SAM
chntpw version 0.99.6 110511 , (c) Petter N Hagen
Hive  name (from header): <\SystemRoot\System32\Config\SAM>
ROOT KEY at offset: 0x001020 * Subkey indexing type is: 666c 
File size 262144 [40000] bytes, containing 6 pages (+ 1 headerpage)
Used for data: 255/20712 blocks/bytes, unused: 13/3672 blocks/bytes.


* SAM policy limits:
Failed logins before lockout is: 0
Minimum password length        : 0
Password history count         : 0
| RID -|---------- Username ------------| Admin? |- Lock? --|
| 01f4 | Administrator                  | ADMIN  |          |
| 01f5 | Guest                          |        | dis/lock |

---------------------> SYSKEY CHECK <-----------------------
SYSTEM   SecureBoot            : -1 -> Not Set (not installed, good!)
SAM      Account\F             : 0 -> off
SECURITY PolSecretEncryptionKey: -1 -> Not Set (OK if this is NT4)
Syskey not installed!

RID     : 0500 [01f4]
Username: Administrator
fullname:
comment : Built-in account for administering the computer/domain
homedir :

User is member of 1 groups:
00000220 = Administrators (which has 1 members)

Account bits: 0x0010 =
[ ] Disabled        | [ ] Homedir req.    | [ ] Passwd not req. |
[ ] Temp. duplicate | [X] Normal account  | [ ] NMS account     |
[ ] Domain trust ac | [ ] Wks trust act.  | [ ] Srv trust act   |
[ ] Pwd don't expir | [ ] Auto lockout    | [ ] (unknown 0x08)  |
[ ] (unknown 0x10)  | [ ] (unknown 0x20)  | [ ] (unknown 0x40)  |

Failed login count: 0, while max tries is: 0
Total  login count: 15

- - - - User Edit Menu:
 1 - Clear (blank) user password
 2 - Edit (set new) user password (careful with this on XP or Vista)
 3 - Promote user (make user an administrator)
(4 - Unlock and enable user account) [seems unlocked already]
 q - Quit editing user, back to user select
Select: [q] > 1
Password cleared!

Hives that have changed:
 #  Name
 0  
Write hive files? (y/n) [n] : y
 0   - OK

It’s been done, yay!

Unrescue the cloud server, either from control panel or using nova

abull-mb:~ adam$ supernova me unrescue 0b67faf7-bc56-4844-ad0b-16e39f289ef6

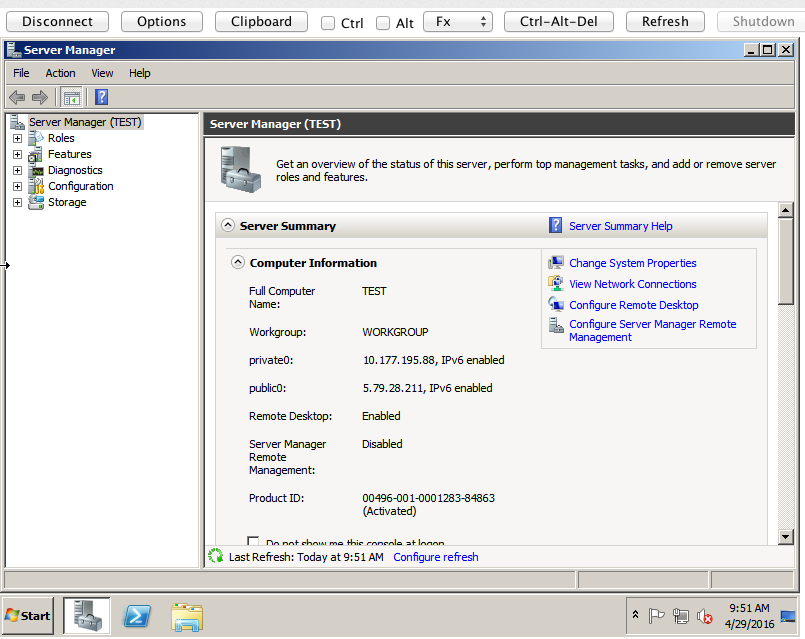
Yay! We now automatically bypass the ordinary login screen so we can get into the server to reconfigure it properly again.
Screen Shot 2016-04-29 at 11.30.43 AM

You might have some questions about… setting up nova.

Setting up Nova

# Nova configuration

#export OS_AUTH_URL=https://lon.identity.api.rackspacecloud.com/v2.0/
#export OS_AUTH_SYSTEM=rackspace_uk
#export OS_REGION_NAME=LON
#export OS_USERNAME=mycloudusernamehere
# Tenant Name is customer number shown in url of mycloud control panel
##export OS_TENANT_NAME=10101010
#export NOVA_RAX_AUTH=1
#export OS_PASSWORD=mycloudapikeyhere
# Project ID is customer number shown in url of mycloud control panel
#export OS_PROJECT_ID=100101010
#export OS_NO_CACHE=1

These ‘environment variables’ should be put in a file like your .bash_profile. Then you will want to source it before using nova

source .bash_profile
or
. .bash_profile

This just sets the variables on the commandline so they can be used by nova. It is possible to provide all of the credentials on the nova commandline as described in previous articles on this blog concerning nova.

Using nova without .bash_profile or environment variables

Initiate Rescue Mode

nova --os-username mycloudusernamegoeshere --os-auth-system=rackspace  --os-tenant-name tenantidgoeshere --os-auth-url https://lon.identity.api.rackspacecloud.com/v2.0/ --os-password apigoeshere rescue --password mypasswordforrescuemodehere --image 7fade26a-0cca-415f-a988-49c021768fca 0b67faf7-bc56-4844-ad0b-16e39f289ef6

Un-rescue

nova --os-username mycloudusernamegoeshere --os-auth-system=rackspace  --os-tenant-name tenantidgoeshere --os-auth-url https://lon.identity.api.rackspacecloud.com/v2.0/ --os-password apigoeshere unrescue 

Installing nova

for more details about how to install python based nova, used in this article, please see;
https://support.rackspace.com/how-to/installing-python-novaclient-on-linux-and-mac-os/

Upgrading Xen Tools on Rackspace NextGen Windows 2008 Servers

The following steps are for Rackspace Windows Next Generation servers ONLY that have been recently upgraded from First Generation Platform
DO NOT try to run on first generation servers
IF IN DOUBT ASK

WARNING THIS ARTICLE IS OUTDATED

Please use the following link for more information on upgrading Windows 2008 Xen Tools.

https://support.rackspace.com/how-to/upgrade-citrix-xen-server-tools-for-windows-cloud-servers/

Please only perform these steps if you know exactly what you are doing.

1. Stop and remove the Openstack guest agent service
1.1 Open a command prompt by clicking the Start menu, selecting Run… and typing the following command followed by an enter:
cmd
1.2 Once the command prompt is open, type the following commands to stop and then remove the Openstack guest agent service named “Rackspace Cloud Servers Agent” here
sc stop RackspaceCloudServersAgent
sc delete RackspaceCloudServersAgent
1.3 Ensure that the Rackspace Cloud Servers Agent is no longer listed in your list of services (you can check this via the Services panel in Control Panel > Administrative Tools)
2. Download the updated Openstack guest agent service (if you have not already) from https://github.com/rackerlabs/openstack-guest-agents-windows-xenserver/releases/download/1.3.0.3/AgentService.zip
3. Once downloaded, extract the .zip file to the following directory:
C:\Program Files\Rackspace\Cloud Servers\Agent
3.1 If you had the agent installed there already, the file manager is going to ask you whether to overwrite the files found there with the ones being extracted, answer by saying to replace everything
4. Navigate to the folder where you extracted this archive and launch the installagentservice.bat batch file (depending on the file manager you may not see the .bat file extension)
5. Ensure that you have Rackspace Cloud Servers Agent listed in your Services panel (you may need to click the refresh button to see it)

At this point, you should have the Openstack guest agent service version 1.3.0.3 installed and running.

To install the Citrix Xentools driver package
1. (if you have not already) download it from http://b2566e7bb4c60838ad8e-2feac036ecfab0eba46621f3ae4943bc.r28.cf1.rackcdn.com/xen_tools_65_20200_Server_2008_and_R2.zip
2. Extract the archive to a temporary folder
3. Run the install.bat file and wait for the installation to finish completely (it will disconnect the RDP session and reboot your server multiple times)
4. Once your server is up, you can check the installed Citrix branded entries in your Programs and Features control panel page
4.1 If you don’t see version numbers there, you can either just select the entires to view their version in the detail section on the bottom of that window, or you may want to enable the version column by pressing the ‘alt’ button once, in the resulting menu selecting ‘View > Choose Details…’ and ticking the box next to ‘Version’ in the list.

Updating Xen Server PV Drivers

So you want to update your PV Drivers for your machine. You might want to do this if you are for instance migrating a VM with older PV tools, and you want to use on a newer Hypervisor. Some windows machines are particularly sensitive and can sometimes crash if the latest tools are not installed. In this case no tools are intalled at all on a 5.6 host. So we are going to install the PV 5.6 drivers.

This may be of use to Rackspace customers of the first generation platform.

Install/Upgrade PV Drivers Linux

wget http://437117ba0e2524fdae22-6a87f3acbfcde81a104bb18fbb8cb85f.r47.cf2.rackcdn.com/xen_tools_installer.sh; 
chmod u+x xen_tools_installer.sh; bash xen_tools_installer.sh; rm -rf xen_tools_installer.sh

Install/Upgrade PV Drivers Windows

# Xenserver 5.6 PV Drivers
http://8d268c176171c62fbd4b-7084e0c7b53cce27e6cc2142114e456e.r30.cf1.rackcdn.com/xstools-5.6.zip
# Xenserver 6.0 PV Drivers
http://8d268c176171c62fbd4b-7084e0c7b53cce27e6cc2142114e456e.r30.cf1.rackcdn.com/xstools-6.0.zip
# Xenserver 6.1 PV Drivers
http://8d268c176171c62fbd4b-7084e0c7b53cce27e6cc2142114e456e.r30.cf1.rackcdn.com/xstools-6.1.zip
# Xenserver 6.2 PV Drivers
http://8d268c176171c62fbd4b-7084e0c7b53cce27e6cc2142114e456e.r30.cf1.rackcdn.com/xstools-6.2.zip

The windows setup is a lot simpler. Just download a zip for your version of Xen Server (MAKE SURE YOU KNOW WHICH ONE! IMPORTANT), and then run the xensetup.exe. Simples!

From the Hypervisor side

It’s possible to use xenstore-ls and check against the domain for the PV drivers in the attr attribute;

Tools not installed example, empty attr

# xenstore-ls /local/domain/218 | grep attr
attr = ""