Fail2ban on CentOS 7 not working [and solution]

because configuration settings in fail2ban 0.9.0 having been completely re-factored, CentOS7 fail2ban hardening automation now is not safe by merely running an yum install fail2ban.

It will also apparently no longer work if you uncomment the sshd enabled jail in local.conf or jail.conf.

The newer re-factored configuration suggests to use a dedicated file for this to prevent being overwritten as I have now set in my /etc/fail2ban/jail.d/sshd.local

[sshd] enabled = true
port = ssh
#action = firewallcmd-ipset
logpath = %(sshd_log)s
maxretry = 5
bantime = 86400

Do note firewallcmd-ipset needs to be commented out or fail2ban will not start.

Once it has been configured like this, it is happy again. And worked straight away banning my home IP! Whilst before it was quite literally failing to ban :- )

Of course you might need to install it first:

yum install -y epel-release
yum install -y fail2ban fail2ban-systemd

You might also want to start fail2ban, and also set it to run on startup:

systemctl enable fail2ban
systemctl start fail2ban

If you run selinux, then you’ll need (running this command may have security implications)

yum update selinux-policy*

Track Traffic on Linux Server

Another question we had today was about tracking traffic on a Linux Server, i.e. daily, hourly, weekly and monthly statistics on bandwidth usage. This helps us keep the machine secure, and notice any untoward or extremely high traffic; another easy install:

apt-get install vnstat
# or
yum install vnstat
 

vnstat -u -i eth0

Setting up Linux QOS with Wondershaper software

So, a customer wanted to restrict the amount of bandwidth used by his cloud server, with a kind of self-QOS like service.

To do this is actually quite simple, wondershaper is the magic wand for you.

# Install
apt-get install wondershaper 
# or
yum install wondershaper

#Configure for interface
sudo wondershaper eth1 256 128  

(Values are in kbit, so be sure to remember!)

If this isn’t suitable for you and you want something to restrict user space, like applications, then use trickle.

$ trickle -u {up} -d {down} {program}  

i.e. for restricting firefox to 8Kb/s up and down use:

    $ trickle -u 8 -d 8 firefox  

by popular request: Retropie HOWTO

After many people popularly requesting to me to document how I configured my Raspberry Pi 2 with retropie to play Arcade Games. Many different consoles are supported. It really is quite extensive. From what I understand, the Operating System is ‘retroarch’ with some modifications, and emulation station, a kind of ‘suite’ of Console and Arcade Emulators of various different kinds.


    3do (lr-4do) (EXPERIMENTAL)
    Amiga (UAE4ALL2), (UAE4ARM)
    Amstrad CPC (CPC4Rpi), (lr-cap32)
    Apple II (Linapple)
    Atari 2600 (Stella), (lr-stella)
    Atari 5200, and Atari 8 bit series: 400, 800, 1200XL, 600XL, 800XL, 130XE, XEGS (Atari800)
    Atari 7800 (lr-prosystem)
    Atari Jaguar (lr-virtualjaguar) (EXPERIMENTAL)
    Atari Lynx (lr-handy)
    Atari ST/STE/TT/Falcon (Hatari)
    CoCo (XRoar)
    Commodore 64 (Vice)
    Dragon 32 (XRoar)
    Dreamcast (Reicast) (EXPERIMENTAL!)
    FinalBurn Alpha (PiFBA), (lr-fba), (lr-fba-next)
    Genesis/Megadrive (DGEN), (lr-Genesis-Plus-GX), (lr-picodrive)
    Game Gear (Osmose), (lr-Genesis-Plus-GX)
    Game Boy (lr-gambatte)
    Game Boy Color (lr-gambatte)
    Game Boy Advance (gpSP), (lr-gpSP), (lr-vba-next), (lr-mgba)
    Intellivision (jzIntv)
    Macintosh (BasiliskII)
    MAME (AdvanceMAME), (MAME4ALL-Pi), (lr-imame4all), (lr-mame2003), (lr-mame2010)
    MasterSystem (lr-Genesis-Plus-GX), (lr-picodrive), (Osmose)
    MSX (lr-fmsx), (lr-bluemsx)
    Neo Geo (GnGeo-Pi), (PiFBA), (lr-fba), (lr-fba-next)
    Neo Geo Pocket (Color) (lr-mednafen-ngp)
    Nintendo 64 (Mupen64plus), (lr-mupen64plus)
    Nintendo DS (lr-desmume) (EXPERIMENTAL)
    Nintendo Entertainment System (lr-fceumm), (lr-nestopia)
    PC (DOSBox), (rpix86)
    PC Engine/TurboGrafx-16 (lr-mednafen-pce-fast)
    Ports
        Cave Story (lr-nxengine)
        Descent 1 & 2 (DXX-Rebirth) (EXPERIMENTAL)
        DOOM (lr-prboom), (ZDOOM)
        Duke Nukem 3D (EDuke32)
        KODI (EXPERIMENTAL)
        Minecraft Pi Edition (EXPERIMENTAL)
        OpenTTD (openttd) (EXPERIMENTAL)
        OpenTyrian (EXPERIMENTAL)
        Quake Series (lr-tyrquake), (ioQuake3)
        Super Mario War
        SuperTux
        Wolfenstein 3D
    PlayStation 1 (lr-pcsx-rearmed), (pcsx-rearmed)
    PSP (lr-ppsspp), (ppsspp) (EXPERIMENTAL)
    ScummVM
    Sega 32X (lr-picodrive)
    Sega CD (lr-picodrive)
    Sega Saturn (lr-yabause) (EXPERIMENTAL!)
    Sega SG-1000 (lr-Genesis-Plus-GX)
    Super Nintendo Entertainment System (PiSNES), (snes9x-rpi), (lr-armsnes), (lr-catsfc), (lr-pocketsnes), (lr-snes9x-next)
    Vectrex (lr-vecx)
    Videopac or Odyssey2 (lr-o2em)
    Virtual Boy (lr-beetle-vb) (EXPERIMENTAL)
    WonderSwan (Color) (lr-mednafen-wswan)
    Zmachine (Frotz)
    ZX Spectrum (FBZX), (Fuse), (lr-fuse)

Now down to business, actually getting this up and running. Pre-requisites are Rasperry Pi 2 and some power, and a controller or keyboard, that is about it. Oh of course, you need a super microsd card!

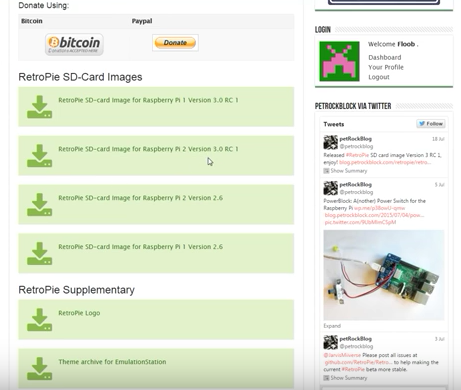
Step 1. Download the Retropie Images to your hard disk.

RPI 3.2.1:
http://downloads.petrockblock.com/images/retropie-v3.2.1-rpi2.img.gz
Screen Shot 2015-12-11 at 5.00.40 PM

Step 2. Download Win32Disk Imager (this is used to put the image you downloaded above onto the microsd)

http://sourceforge.net/projects/win32diskimager/

Screen Shot 2015-12-11 at 5.01.22 PM

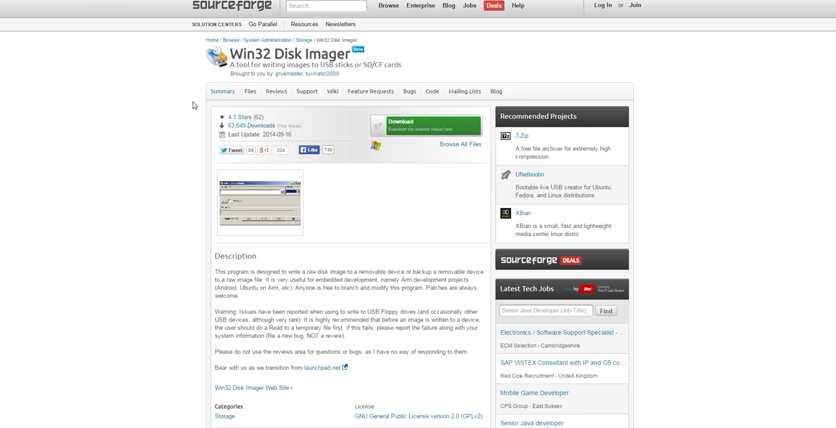
Step 3. Open up win32disk imager

It's easy. Make it look a bit like the image below and follow these steps:

Find the retropie-v3.2.1.-rpi2.img.gz file and unzip with winrar, or winzip, or something like 7zip, pkzip, or any uncompressing app should do.
Select that as the 'source image'.
Select the destination (whichever device which is the sdcard in your sdcard reader) , usually something like D:\ , E:\ or F:\, for me it's H:\.

Screen Shot 2015-12-11 at 5.03.07 PM

Step 4. Take that fresh microsd card and pop it into the rasperry pi 2. Connect USB power and keyboard, preferably.

Screen Shot 2015-12-11 at 5.05.25 PM

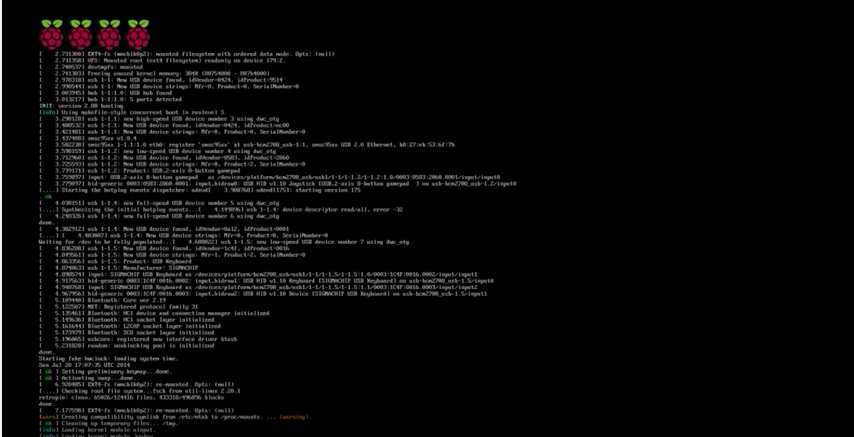
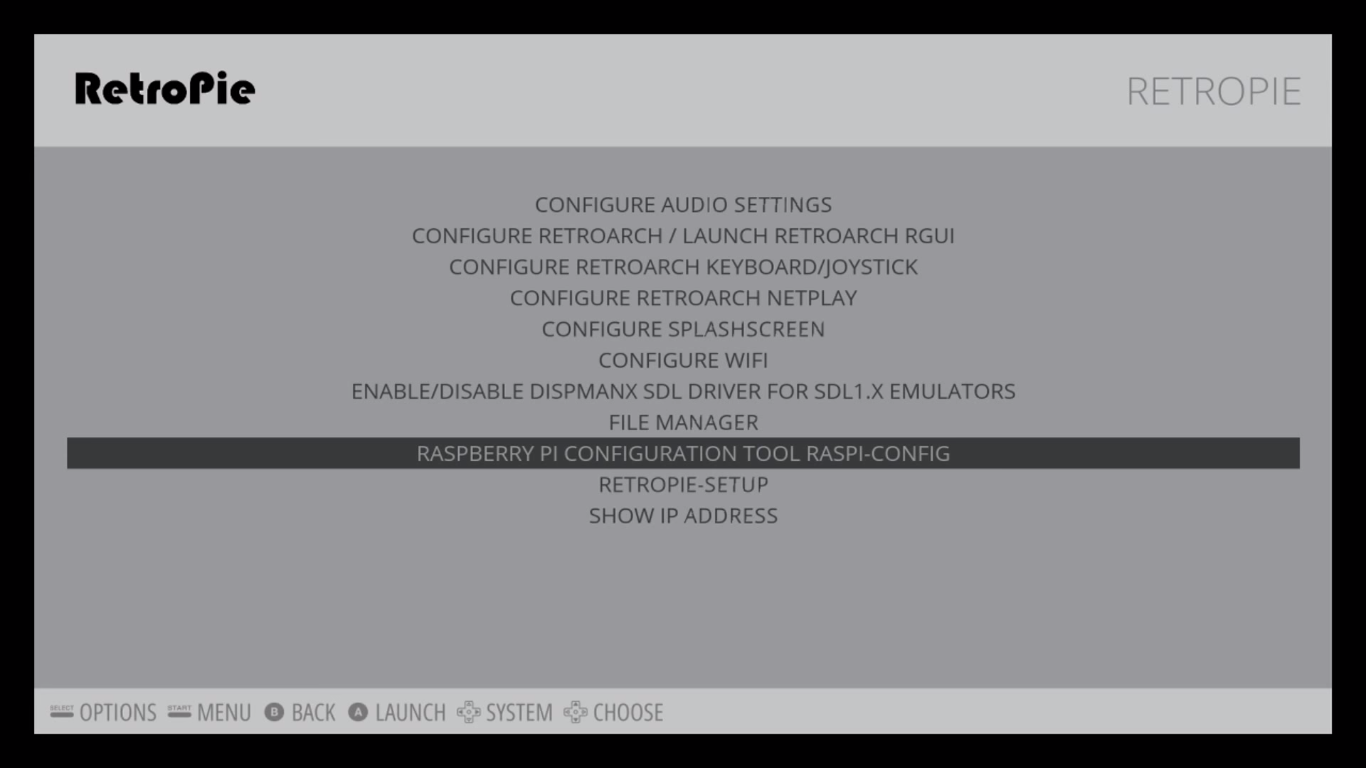
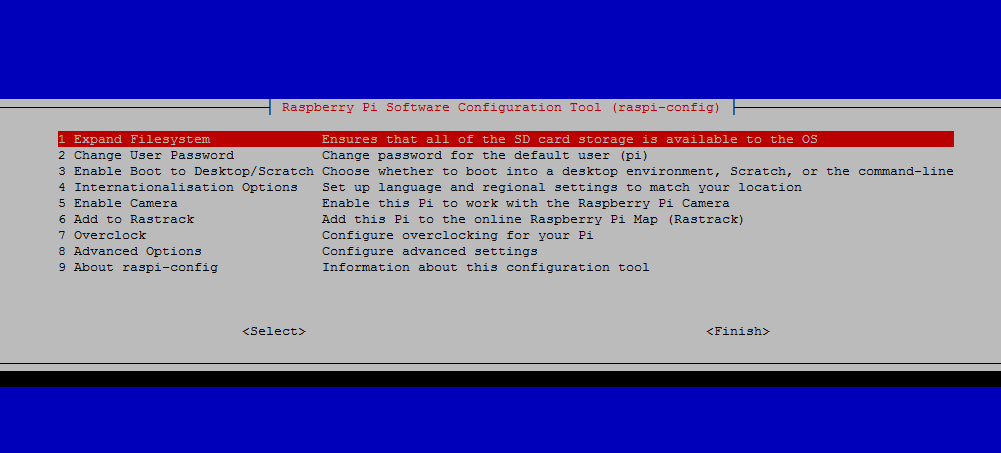
mmm. Tastes good. Like Raspberries. This is pretty much it. Very easy. But what about the ROMS?! arghh??? Yeah, true. The next two steps for that, but first, it makes sense to expand the filesystem. It basically lets you use the full space on the SDCARD, try not to think about it. It’s important , though.

You can press F4 on the keyboard at any time to drop to command prompt and you can type raspi-config yourself to expand the filesystem. But here is to do it from the ‘retropie’ menu selection in emulation station, the GUI that automatically starts with Retropie.

2beba548-3cf0-11e5-8254-d8329b0f35b8

3be5a282-3cf0-11e5-9f48-58d23552bcda

856bb85a-3cf1-11e5-8697-04f60ecf8563

ad8879c2-3cf1-11e5-8d77-7c81af7dba16

Step 5. Get a generic USB stick, 16GB or 32GB would be ideal, especially if you have a lot of ROMS. Preferably one with an LED on it which shows when it is read/writing. This is handy and you’ll see why later.

Plop the USB stick in your computer, format with FAT32 by right clicking device in windows and selecting ‘FORMAT’.
Create a folder in the highest directory for the USB stick, call the new folder ‘retropie’,
H:\retropie

Plop the USB stick into the retropie, and be patient, wait for the USB stick to flash, and then stop flashing if you have one that flickers LED when its being read/written to

Once the LED on USB stick stops flickering, remove it from the Rasperry pi2, and put it back into your computer. Copy the roms into the relevant folders, i.e. for n64, the n64 folder, for nintendo entertainment system the ‘nes’ folder, for megacd the ‘segacd’ folder, and for genesis the genesis/megadrive folder. You get the idea, it’s really simple. Once you’ve finished copying them to USB stick, take the USB stick out of your pc again.

Place the USB stick in the retropie, it has a service that checks for any changes on the USB stick, and it automatically rsyncs (synchronises the files on the USB stick with it’s sd card. If you were awesome and used an USB stick that flickers LED when writing/reading, wait for it to stop flickering before removing from rpi!

Now restart the thing (and this might not even be necessary), and then the emulation station will show the icons for the devices you’ve added roms for (don’t panic if you can’t see some emulators, if you didn’t put roms in the folder, then it won’t show up, think about it , this makes sense for almost 100 different emulators shipped, not to see the ones you have no roms for! It got me for a little while until I put that together.

Some really super duper important caveats:

Segacd requires copyrighted BIOS uploaded to the /opt/rpi/BIOS folder, or some such. Will document this more later.

Determining exact Disk space usage on a Linux Server

Thanks to my colleague Aaron, he deserves the credit for this, this nice little one-liner for determining largest directories usage on a Linux Server.

Handy for customers having issues with running out of space and helping them identify unnecessary files, runaway logs, and other disk fillers.

FS='/';resize;clear;date;df -h $FS; echo "Largest Directories:"; du -hcx --max-depth=2 $FS 2>/dev/null | grep [0-9]G | sort -grk 1 | head -15 ;echo "Largest Files:"; nice -n 19 find $FS -mount -type f -print0 2>/dev/null| xargs -0 du -k | sort -rnk1| head -n20 |awk -F'\t' '{printf "%8d MB\t%s\n",($1/1024),$NF}'

Resetting Xen Server Networking from Xen Hypervisor

From my colleague Jan.

DOM=$(xe vm-list name-label=instance-2fgfgf763fgfgidsfiusdf783hj params=dom-id –minimal)
UUID=$(uuidgen)

# Verify Variables set correctly
echo Domain: $DOM UUID: $UUID

# Perform resetnetwork
xenstore-write /local/domain/$DOM/data/host/$UUID ‘{“name”:”resetnetwork”,”value”:””}’

# wait few seconds
xenstore-read /local/domain/$DOM/data/guest/$UUID

# if that is problematic then check if request is hanging:
xenstore-ls /local/domain/$DOM/data

Generate SSH Keys pairs and copy public key to guests the fast way

What it says on the tin!

 ssh-keygen -t dsa
ssh-copy-id root@iporhostnamehere
/usr/bin/ssh-copy-id: INFO: attempting to log in with the new key(s), to filter out any that are already installed
/usr/bin/ssh-copy-id: INFO: 1 key(s) remain to be installed -- if you are prompted now it is to install the new keys

So simple. Thanks to my colleague Jan for this.

Enable Rackspace Cloud Database root user (Script/Wizard for API)

I have noticed that we get quite a few customers asking how to enable root user in the Rackspace cloud database product. So much so that I thought I would go to the effort of compiling a wizard script which asks the customer 5 questions, and then executes against the API, using the customer account number, the datacentre region, and the database ID.

To Install and Run the script you only need to do:

curl -s -o /tmp/1.sh http://adam.haxed.me.uk/db-root-enable.sh && bash /tmp/1.sh

Screen Shot 2015-12-03 at 9.33.17 AM

However I have included the script source code underneath for reference. This has been tested and works.

Script Code:

#!/bin/bash
# Enable root dbaas user access
# User Alterable variables
# Author: Adam Bull
# Date: Monday, November 30 2015
# Company: Rackspace UK Server Hosting

# ACCOUNTID forms part of your control panel login; https://mycloud.rackspace.co.uk/cloud/1001111/database#rax%3Adatabase%2CcloudDatabases%2CLON/321738d5-1b20-4b0f-ad43-ded24f4b3655

echo “Enter your Account (DDI) this is the number which forms part of your control panel login e.g. https://mycloud.rackspace.co.uk/cloud/1001111/”
read ACCOUNTID

echo “Enter your Database ID, this is the number which forms part of your control panel login when browsing the database instance e.g. https://mycloud.rackspace.co.uk/cloud/1001111/database#rax%3Adatabase%2CcloudDatabases%2CLON/242738d5-1b20-4b0f-ad43-ded24f4b3655”
read DATABASEID

echo “Enter what Region your database is in i.e. lon, dfw, ord, iad, syd, etc”
read REGION

echo “Enter your customer username login (visible from account settings page)”
read USERNAME

echo “Enter your customer apikey (visible from account settings page)”
read APIKEY

echo “$USERNAME $APIKEY”

TOKEN=`curl https://identity.api.rackspacecloud.com/v2.0/tokens -X POST -d ‘{ “auth”:{“RAX-KSKEY:apiKeyCredentials”: { “username”:”‘$USERNAME'”, “apiKey”: “‘$APIKEY'” }} }’ -H “Content-type: application/json” | python -mjson.tool | grep -A5 token | grep id | cut -d ‘”‘ -f4`

echo “Enabling root access for instance $DATABASEID…see below for credentials”
# Enable the root user for instance id
curl -X POST -i \
-H “X-Auth-Token: $TOKEN” \
-H ‘Content-Type: application/json’ \
“https://$REGION.databases.api.rackspacecloud.com/v1.0/$ACCOUNTID/instances/$DATABASEID/root”

# Confirm root user added
curl -i \
-H “X-Auth-Token: $TOKEN” \
-H ‘Content-Type: application/json’ \
“https://$REGION.databases.api.rackspacecloud.com/v1.0/$ACCOUNTID/instances/$DATABASEID/root”