A lot of customers ask the question of how to have a data volume that can be incrementally increased in size vertically over a period of time. Here is how to setup a server like that from start to finish.
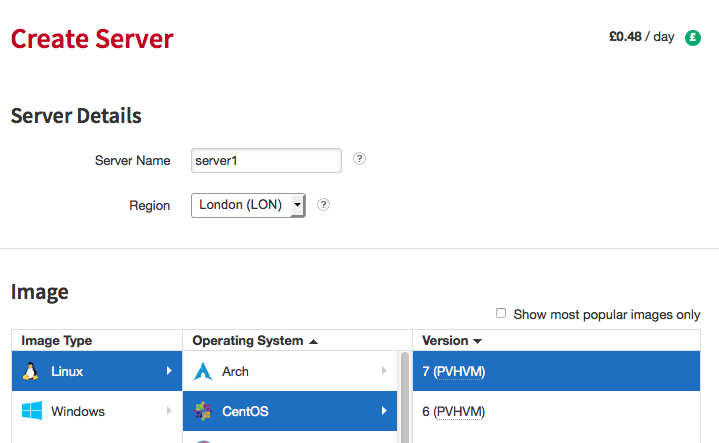
Step 1. Create Rackspace Cloud server
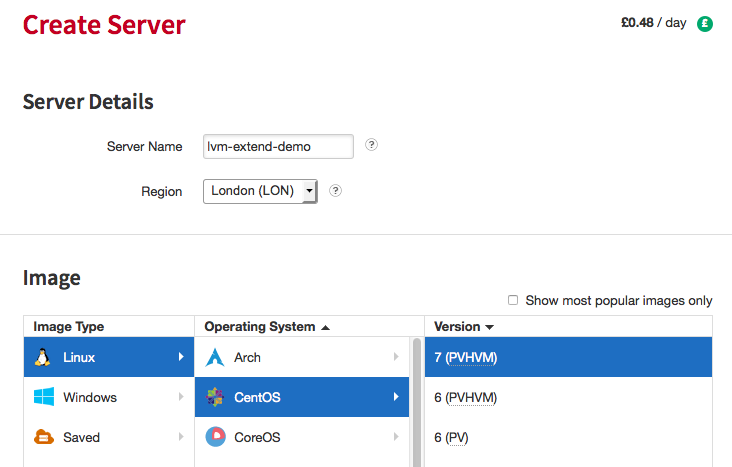
Click create server at bottom left once you are happy with the distribution you want to use:
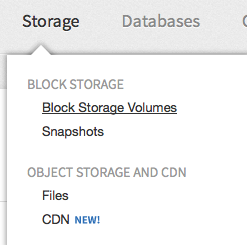
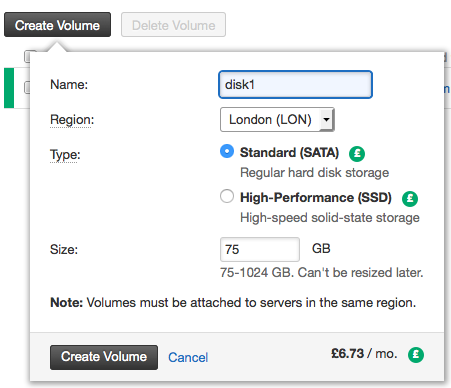
Step 2. Create Cloud Block Storage Volumes. In this case I’m going to create 3 x 75 Gig disks.
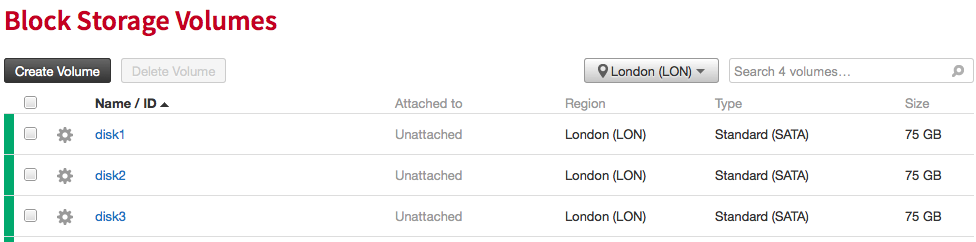
Now your done creating your server and the volumes you are going to use with it. We could have just added 1 Cloud block storage volume, and added the others later, but for this demo, we’re going to show you how to extend the initial partition with the space capacity of the other 2.
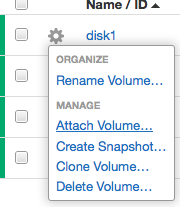
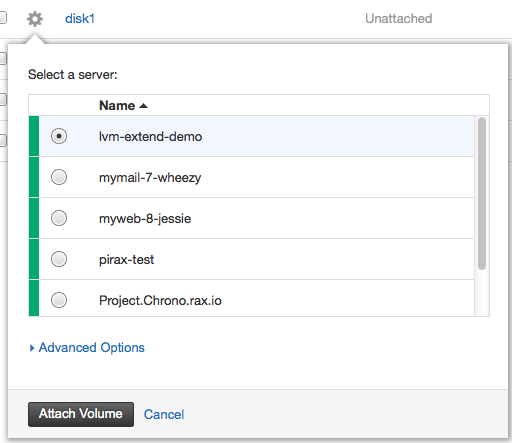
Step 3. Attach your Cloud Block Storage Volumes to the server:
Step 4. Login to your Cloud Server
$ ssh [email protected]
The authenticity of host '37.188.1.1 (37.188.1.1)' can't be established.
RSA key fingerprint is 51:e9:e6:c1:4b:f8:24:9f:2a:8a:36:ec:bf:47:23:d4.
Are you sure you want to continue connecting (yes/no)? yes
Warning: Permanently added '37.188.1.1' (RSA) to the list of known hosts.
Last login: Thu Jan  1 00:00:10 1970
Step 5. Run fdisk -l (list) to see attached volumes to server
Disk /dev/xvdc: 536 MB, 536870912 bytes, 1048576 sectors
Units = sectors of 1 * 512 = 512 bytes
Sector size (logical/physical): 512 bytes / 512 bytes
I/O size (minimum/optimal): 512 bytes / 512 bytes
Disk label type: dos
Disk identifier: 0x0004ece3
Device Boot Start End Blocks Id System
/dev/xvdc1 2048 1048575 523264 83 Linux
Disk /dev/xvda: 21.5 GB, 21474836480 bytes, 41943040 sectors
Units = sectors of 1 * 512 = 512 bytes
Sector size (logical/physical): 512 bytes / 512 bytes
I/O size (minimum/optimal): 512 bytes / 512 bytes
Disk label type: dos
Disk identifier: 0x000b1244
Device Boot Start End Blocks Id System
/dev/xvda1 * 2048 41943039 20970496 83 Linux
Disk /dev/xvdb: 80.5 GB, 80530636800 bytes, 157286400 sectors
Units = sectors of 1 * 512 = 512 bytes
Sector size (logical/physical): 512 bytes / 512 bytes
I/O size (minimum/optimal): 512 bytes / 512 bytes
Disk /dev/xvdd: 80.5 GB, 80530636800 bytes, 157286400 sectors
Units = sectors of 1 * 512 = 512 bytes
Sector size (logical/physical): 512 bytes / 512 bytes
I/O size (minimum/optimal): 512 bytes / 512 bytes
I actually discovered at this point that CentOS 7 only supports 3 virtual disks as standard. I’m having the issue because the Rackspace centOS 7 image is shipping with HVM which is causing the issues, if it was just PV type we would be okay. You should switch to a PV version of CentOS now if you want more than 3 virtual disks with your Rackspace Cloud Server.
Step 5: Running the same command on a CentOS 6 PV server allows me to add more disks thru the control panel
[root@lvm-extend-test ~]# fdisk -l

Disk /dev/xvdc: 536 MB, 536870912 bytes
70 heads, 4 sectors/track, 3744 cylinders
Units = cylinders of 280 * 512 = 143360 bytes
Sector size (logical/physical): 512 bytes / 512 bytes
I/O size (minimum/optimal): 512 bytes / 512 bytes
Disk identifier: 0x000f037d

    Device Boot      Start         End      Blocks   Id  System
/dev/xvdc1               8        3745      523264   83  Linux

Disk /dev/xvda: 21.5 GB, 21474836480 bytes
255 heads, 63 sectors/track, 2610 cylinders
Units = cylinders of 16065 * 512 = 8225280 bytes
Sector size (logical/physical): 512 bytes / 512 bytes
I/O size (minimum/optimal): 512 bytes / 512 bytes
Disk identifier: 0x0003e086

    Device Boot      Start         End      Blocks   Id  System
/dev/xvda1   *           1        2611    20970496   83  Linux

Disk /dev/xvdb: 80.5 GB, 80530636800 bytes
255 heads, 63 sectors/track, 9790 cylinders
Units = cylinders of 16065 * 512 = 8225280 bytes
Sector size (logical/physical): 512 bytes / 512 bytes
I/O size (minimum/optimal): 512 bytes / 512 bytes
Disk identifier: 0x00000000


Disk /dev/xvdd: 80.5 GB, 80530636800 bytes
255 heads, 63 sectors/track, 9790 cylinders
Units = cylinders of 16065 * 512 = 8225280 bytes
Sector size (logical/physical): 512 bytes / 512 bytes
I/O size (minimum/optimal): 512 bytes / 512 bytes
Disk identifier: 0x00000000


Disk /dev/xvde: 80.5 GB, 80530636800 bytes
255 heads, 63 sectors/track, 9790 cylinders
Units = cylinders of 16065 * 512 = 8225280 bytes
Sector size (logical/physical): 512 bytes / 512 bytes
I/O size (minimum/optimal): 512 bytes / 512 bytes
Disk identifier: 0x00000000


Disk /dev/xvdf: 80.5 GB, 80530636800 bytes
255 heads, 63 sectors/track, 9790 cylinders
Units = cylinders of 16065 * 512 = 8225280 bytes
Sector size (logical/physical): 512 bytes / 512 bytes
I/O size (minimum/optimal): 512 bytes / 512 bytes
Disk identifier: 0x00000000


Disk /dev/xvdg: 80.5 GB, 80530636800 bytes
255 heads, 63 sectors/track, 9790 cylinders
Units = cylinders of 16065 * 512 = 8225280 bytes
Sector size (logical/physical): 512 bytes / 512 bytes
I/O size (minimum/optimal): 512 bytes / 512 bytes
Disk identifier: 0x00000000
Many disks are now available, we can see them by running:
[root@lvm-extend-test ~]# ls /dev/xv*
/dev/xvda  /dev/xvda1  /dev/xvdb  /dev/xvdc  /dev/xvdc1  /dev/xvdd  /dev/xvde  /dev/xvdf  /dev/xvdg
Step 6: Run cfdisk and start partitioning each disk.
cfdisk /dev/xvdb
Create New Partition of Primary Partition Type
 Using maximum space available

Using type 8E LVM Filesystem TYPE
Write partition data:

Step 7: Repeat this for any additional block storage disks you may have. I have a total of 5 CBS volumes, so I need to repeat this another 4 times.
<pre>
cfdisk /dev/xvdc
cfdisk /dev/xvde
cfdisk /dev/xvdf
cfdisk /dev/xvdg
Step 8: Verify that the partitions exist. (check each one has a 1 on the end now)
[root@lvm-extend-test ~]# ls /dev/xvd*
/dev/xvda  /dev/xvda1  /dev/xvdb  /dev/xvdb1  /dev/xvdc  /dev/xvdc1  /dev/xvdd  /dev/xvdd1  /dev/xvde  /dev/xvde1  /dev/xvdf  /dev/xvdf1  /dev/xvdg  /dev/xvdg1
Step 9: Install LVM
yum install lvm2
Step 10: Create first physical volume
[root@lvm-extend-test ~]# pvcreate /dev/xvdb1
  Physical volume "/dev/xvdb1" successfully created
Step 11: Check Physical Volume
 [root@lvm-extend-test ~]# pvdisplay
  "/dev/xvdb1" is a new physical volume of "75.00 GiB"
  --- NEW Physical volume ---
  PV Name               /dev/xvdb1
  VG Name
  PV Size               75.00 GiB
  Allocatable           NO
  PE Size               0
  Total PE              0
  Free PE               0
  Allocated PE          0
  PV UUID               7Vv8Rf-hRIr-b7Cb-aaxY-baeg-zVKR-BblJij
Step 11: Create a volume group on the first physical volume and give it a name DataGroup00
[root@lvm-extend-test ~]# vgcreate DataGroup00 /dev/xvdb1
  Volume group "DataGroup00" successfully created

[root@lvm-extend-test ~]# vgdisplay
  --- Volume group ---
  VG Name               DataGroup00
  System ID
  Format                lvm2
  Metadata Areas        1
  Metadata Sequence No  1
  VG Access             read/write
  VG Status             resizable
  MAX LV                0
  Cur LV                0
  Open LV               0
  Max PV                0
  Cur PV                1
  Act PV                1
  VG Size               75.00 GiB
  PE Size               4.00 MiB
  Total PE              19199
  Alloc PE / Size       0 / 0
  Free  PE / Size       19199 / 75.00 GiB
  VG UUID               Gm00iH-2a15-HO8K-Pbnj-80oh-E2Et-LE1Y2A
Currently the disk is 75GB. We now want to expand/extend with LVM the size of the disk. Doing this is simple enough.
Step 12: Extend Volume size with LVM
[root@lvm-extend-test ~]# vgextend DataGroup00 /dev/xvdd1
  Physical volume "/dev/xvdd1" successfully created
  Volume group "DataGroup00" successfully extended
[root@lvm-extend-test ~]# vgdisplay
  --- Volume group ---
  VG Name               DataGroup00
  System ID
  Format                lvm2
  Metadata Areas        2
  Metadata Sequence No  2
  VG Access             read/write
  VG Status             resizable
  MAX LV                0
  Cur LV                0
  Open LV               0
  Max PV                0
  Cur PV                2
  Act PV                2
  VG Size               149.99 GiB
  PE Size               4.00 MiB
  Total PE              38398
  Alloc PE / Size       0 / 0
  Free  PE / Size       38398 / 149.99 GiB
  VG UUID               Gm00iH-2a15-HO8K-Pbnj-80oh-E2Et-LE1Y2A
Now we can see we got double the space! Lets keep extending it.
Step 13: Extend Volume size again with LVM some more.
[root@lvm-extend-test ~]# vgextend DataGroup00 /dev/xvde1
  Physical volume "/dev/xvde1" successfully created
  Volume group "DataGroup00" successfully extended
[root@lvm-extend-test ~]# vgdisplay
  --- Volume group ---
  VG Name               DataGroup00
  System ID
  Format                lvm2
  Metadata Areas        3
  Metadata Sequence No  3
  VG Access             read/write
  VG Status             resizable
  MAX LV                0
  Cur LV                0
  Open LV               0
  Max PV                0
  Cur PV                3
  Act PV                3
  VG Size               224.99 GiB
  PE Size               4.00 MiB
  Total PE              57597
  Alloc PE / Size       0 / 0
  Free  PE / Size       57597 / 224.99 GiB
  VG UUID               Gm00iH-2a15-HO8K-Pbnj-80oh-E2Et-LE1Y2A

[root@lvm-extend-test ~]# vgextend DataGroup00 /dev/xvdf1
  Physical volume "/dev/xvdf1" successfully created
  Volume group "DataGroup00" successfully extended
[root@lvm-extend-test ~]# vgdisplay
  --- Volume group ---
  VG Name               DataGroup00
  System ID
  Format                lvm2
  Metadata Areas        4
  Metadata Sequence No  4
  VG Access             read/write
  VG Status             resizable
  MAX LV                0
  Cur LV                0
  Open LV               0
  Max PV                0
  Cur PV                4
  Act PV                4
  VG Size               299.98 GiB
  PE Size               4.00 MiB
  Total PE              76796
  Alloc PE / Size       0 / 0
  Free  PE / Size       76796 / 299.98 GiB
  VG UUID               Gm00iH-2a15-HO8K-Pbnj-80oh-E2Et-LE1Y2A

[root@lvm-extend-test ~]# vgextend DataGroup00 /dev/xvdg1
  Physical volume "/dev/xvdg1" successfully created
  Volume group "DataGroup00" successfully extended
[root@lvm-extend-test ~]# vgdisplay
  --- Volume group ---
  VG Name               DataGroup00
  System ID
  Format                lvm2
  Metadata Areas        5
  Metadata Sequence No  5
  VG Access             read/write
  VG Status             resizable
  MAX LV                0
  Cur LV                0
  Open LV               0
  Max PV                0
  Cur PV                5
  Act PV                5
  VG Size               374.98 GiB
  PE Size               4.00 MiB
  Total PE              95995
  Alloc PE / Size       0 / 0
  Free  PE / Size       95995 / 374.98 GiB
  VG UUID               Gm00iH-2a15-HO8K-Pbnj-80oh-E2Et-LE1Y2A
Now we are at 374.98GB Capacity. 5 x 75GB. No problems at all! Imagine if you were doing this with 1000GIG volumes. You could put yourself together a pretty tight CBS. The thing i’d be worried bout was data loss though. So you’d want a server identical to this, with rsync setup across the two for some level of redundancy. and you’d want it, preferably in a completely different datacentre, too.
Last thing now. Actually creating the ext4 filesystem on this volumegroup. We’ve partitioned so that the disk can be used. We’ve created volume and group so that disks can be assigned to the OS as a disk. Now we need to format it with the filesystem. So lets take some steps to do that:
Step 13: Create Logical Volume and Verify
[root@lvm-extend-test ~]# lvcreate -l +100%FREE DataGroup00 -n data
  Logical volume "data" created.

[root@lvm-extend-test ~]# lvdisplay
  --- Logical volume ---
  LV Path                /dev/DataGroup00/data
  LV Name                data
  VG Name                DataGroup00
  LV UUID                JGTRSg-JdNm-aumq-wJFC-VHVb-Sdm9-VVfp5c
  LV Write Access        read/write
  LV Creation host, time lvm-extend-test, 2015-10-12 11:53:45 +0000
  LV Status              available
  # open                 0
  LV Size                374.98 GiB
  Current LE             95995
  Segments               5
  Allocation             inherit
  Read ahead sectors     auto
  - currently set to     256
  Block device           253:0
Step 14: Make Volume Active
[root@lvm-extend-test ~]# vgscan
  Reading all physical volumes.  This may take a while...
  Found volume group "DataGroup00" using metadata type lvm2
Step 15: Create Filesystem on physical volume
[root@lvm-extend-test ~]# mkfs.ext4 /dev/mapper/DataGroup00-data
mke2fs 1.41.12 (17-May-2010)
Filesystem label=
OS type: Linux
Block size=4096 (log=2)
Fragment size=4096 (log=2)
Stride=0 blocks, Stripe width=0 blocks
24576000 inodes, 98298880 blocks
4914944 blocks (5.00%) reserved for the super user
First data block=0
Maximum filesystem blocks=4294967296
3000 block groups
32768 blocks per group, 32768 fragments per group
8192 inodes per group
Superblock backups stored on blocks:
	32768, 98304, 163840, 229376, 294912, 819200, 884736, 1605632, 2654208,
	4096000, 7962624, 11239424, 20480000, 23887872, 71663616, 78675968

Writing inode tables: done
Creating journal (32768 blocks): done
Writing superblocks and filesystem accounting information: done

This filesystem will be automatically checked every 30 mounts or
180 days, whichever comes first.  Use tune2fs -c or -i to override.
Step 16: Making a moint point folder
mkdir /lvm-data
Step 17: Update your fstab (TAKE CARE) so that the disk is attached to the required on boot
[root@lvm-extend-test ~]# vi /etc/fstab

# Required line
/dev/mapper/DataGroup00-data    /lvm-data           ext4    defaults        0 0
Step 18: Mount the LVM
[root@lvm-extend-test ~]# mount /lvm-data
[root@lvm-extend-test ~]#
There ya go! You have your 375GB Volume! You can extend this at any point! Just simply make a new CBS volume and then repeat the process of mounting it and then extending it.